Introduction
PIGO8 is a Go library for building retro-style games with intentional constraints that accelerate creativity. Rather than being overwhelmed by infinite possibilities, you work within a focused environment: a compact screen, limited colors, and a simple API that does one thing well.
Why Build Games with Constraints?
Game development often fails not from lack of tools, but from too many choices. PIGO8 gives you:
- A fixed canvas: 128×128 pixels by default (customizable for Game Boy, NES, or other resolutions)
- A curated palette: 16 colors that work beautifully together
- A minimal API: Draw sprites, handle input, play sounds—nothing more
- Instant feedback: See changes immediately with hot reload support
These constraints mirror what made 8-bit game development productive: small scope, clear boundaries, finished games.
What You Can Build
PIGO8 is ideal for:
- Arcade games: Pong, Space Invaders, Breakout clones
- Platformers: Side-scrolling adventures with tile-based maps
- Puzzle games: Match-3, Tetris-style, or logic puzzles
- Prototypes: Test game mechanics before committing to a larger engine
- Game jams: Ship something playable in 48 hours
The PICO-8 Connection
PIGO8 is inspired by PICO-8, a fantasy console with a dedicated following. If you've written PICO-8 games in Lua, you'll find the API familiar. Functions like Spr(), Map(), Btn(), and Cls() work similarly.
However, PIGO8 is not PICO-8:
- Written in Go, not Lua (arrays start at 0, not 1)
- No artificial code/memory limits
- Can target any resolution, not just 128×128
- Exports to native binaries and WebAssembly
- Open source under MIT license
What's in This Documentation?
This guide covers:
- Getting Started: Installation and your first game
- Graphics: Drawing pixels, shapes, text, and sprites
- Maps: Tile-based level design
- Input: Keyboard, gamepad, and mouse handling
- Audio: Playing sound effects and music
- Game Mechanics: Camera, collision detection, math utilities
- Advanced Topics: Web export, multiplayer, porting PICO-8 games
- Tutorials: Step-by-step game projects
Prerequisites
This documentation assumes you:
- Know Go basics (packages, structs, methods, interfaces)
- Have Go 1.21+ installed
- Have a code editor with Go support
You don't need prior game development experience—that's what we're here to teach.
Installation
Prerequisites
PIGO8 requires:
- Go 1.21 or later (download)
- A C compiler for CGO (required by the underlying Ebitengine):
- macOS: Xcode Command Line Tools (
xcode-select --install) - Linux: GCC (
sudo apt install gccor equivalent) - Windows: TDM-GCC or MinGW-w64
- macOS: Xcode Command Line Tools (
Installing PIGO8
Create a new Go module and add PIGO8:
mkdir my-game && cd my-game
go mod init my-game
go get github.com/drpaneas/pigo8
Verifying Installation
Create a main.go file:
package main

import p8 "github.com/drpaneas/pigo8"

type game struct{}

func (g *game) Init()   {}
func (g *game) Update() {}
func (g *game) Draw()   { p8.Cls(1) }

func main() {
    p8.InsertGame(&game{})
    p8.Play()
}
Run it:
go run .
You should see a window with a dark blue background. Press Enter to open the pause menu, and select "Quit" to exit.
Project Structure
A typical PIGO8 project looks like:
my-game/
├── main.go              # Game code
├── embed.go             # Resource embedding (auto-generated)
├── spritesheet.json     # Sprite definitions
├── map.json             # Tile map data
├── palette.hex          # Custom color palette (optional)
├── music0.wav           # Sound effects / music (optional)
└── go.mod
Platform-Specific Notes
macOS Apple Silicon
Works out of the box. No additional configuration needed.
Linux
Install these dependencies for audio and graphics:
# Debian/Ubuntu
sudo apt install libasound2-dev libgl1-mesa-dev xorg-dev

# Fedora
sudo dnf install alsa-lib-devel mesa-libGL-devel xorg-x11-server-devel
Windows
Use PowerShell or CMD. If you encounter CGO errors, ensure your compiler is in PATH.
WebAssembly
See the Web Export guide for browser deployment.
Hello World
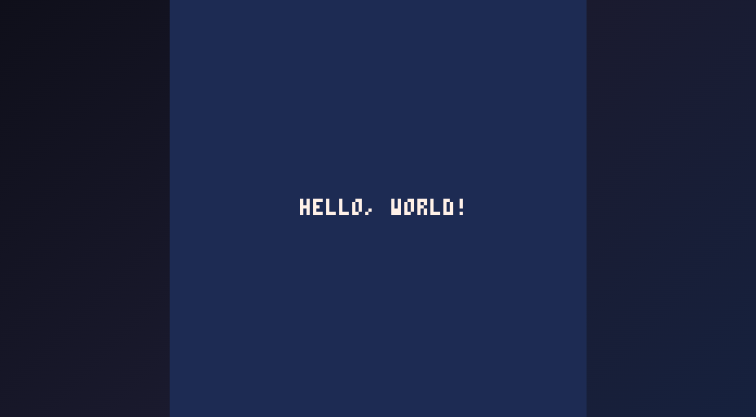
Let's build the simplest possible PIGO8 game: a screen that displays "Hello, World!"
The Complete Game
Create main.go:
package main

import p8 "github.com/drpaneas/pigo8"

type game struct{}

func (g *game) Init()   {}
func (g *game) Update() {}

func (g *game) Draw() {
    p8.Cls(1)                          // Clear screen with dark blue
    p8.Print("hello, world!", 40, 60)  // Draw text at (40, 60)
}

func main() {
    p8.InsertGame(&game{})
    p8.Play()
}
Run it:
go run .
What's Happening?
The Game Struct
type game struct{}
Your game state lives in a struct. For now it's empty, but you'll add player position, score, and other state here.
The Cartridge Interface
PIGO8 expects your game to implement three methods:
func (g *game) Init()   {}  // Called once at startup
func (g *game) Update() {}  // Called every frame for logic
func (g *game) Draw()   {}  // Called every frame for rendering
This is the game loop—the heartbeat of every game.
Inserting and Playing
p8.InsertGame(&game{})  // Register your game
p8.Play()               // Start the engine
Think of it like inserting a cartridge into a console.
Understanding the Draw Function
func (g *game) Draw() {
    p8.Cls(1)                          // Clear to color 1 (dark blue)
    p8.Print("hello, world!", 40, 60)  // White text by default
}
Cls(colorIndex)clears the screen. Color 1 is dark blue in the default palette.Print(text, x, y)draws text. Coordinates start at (0, 0) in the top-left corner.
Next Steps
You now have a working PIGO8 game. In the next chapter, we'll explore the game loop in detail and add interactivity.
The Game Loop
Every game runs a continuous loop: read input, update state, render graphics. PIGO8 handles the loop for you through three methods.
Init, Update, Draw
type Cartridge interface {
    Init()   // Called once when the game starts
    Update() // Called every frame (default: 30 times/second)
    Draw()   // Called every frame after Update
}
Init
Runs once before the first frame. Use it to:
- Set initial positions
- Load level data
- Initialize scores
func (g *game) Init() {
    g.playerX = 64
    g.playerY = 64
    g.score = 0
}
Update
Runs every frame before Draw. Use it to:
- Read input
- Move game objects
- Check collisions
- Update game state
func (g *game) Update() {
    if p8.Btn(p8.LEFT) {
        g.playerX--
    }
    if p8.Btn(p8.RIGHT) {
        g.playerX++
    }
}
Important: Never draw in Update. Drawing operations only work in Draw.
Draw
Runs every frame after Update. Use it to:
- Clear the screen
- Draw backgrounds, sprites, and UI
- Render everything visible
func (g *game) Draw() {
    p8.Cls(0)                          // Always clear first
    p8.Spr(1, g.playerX, g.playerY)    // Draw player sprite
    p8.Print(g.score, 2, 2, 7)         // Draw score
}
Frame Timing
By default, PIGO8 runs at 30 FPS (frames per second). Each frame:
Update()is calledDraw()is called- The screen is displayed
- Wait until the next frame is due
At 30 FPS, each frame is ~33 milliseconds. At 60 FPS, each frame is ~16 milliseconds.
Changing FPS
Use settings to change the frame rate:
func main() {
    settings := p8.NewSettings()
    settings.TargetFPS = 60  // Smoother animation

    p8.InsertGame(&game{})
    p8.PlayGameWith(settings)
}
Higher FPS means smoother animation but faster game speed if you're using fixed movement values. Consider using delta time for frame-rate independent movement.
Time Function
Get the elapsed time since the game started:
func (g *game) Update() {
    elapsed := p8.Time()  // Returns seconds as float64

    // Do something every 2 seconds
    if int(elapsed) % 2 == 0 {
        // ...
    }
}
Complete Example: Moving Square
package main

import p8 "github.com/drpaneas/pigo8"

type game struct {
    x, y float64
}

func (g *game) Init() {
    g.x = 60
    g.y = 60
}

func (g *game) Update() {
    if p8.Btn(p8.LEFT)  { g.x-- }
    if p8.Btn(p8.RIGHT) { g.x++ }
    if p8.Btn(p8.UP)    { g.y-- }
    if p8.Btn(p8.DOWN)  { g.y++ }
}

func (g *game) Draw() {
    p8.Cls(0)
    p8.Rectfill(g.x, g.y, g.x+8, g.y+8, 8)  // Red square
}

func main() {
    p8.InsertGame(&game{})
    p8.Play()
}
Arrow keys move the red square. The game loop makes it responsive.
See Also
Settings
PIGO8 provides sensible defaults, but you can customize window size, frame rate, resolution, and more.
Default Settings
settings := p8.NewSettings()
// Returns:
// ScaleFactor:  4      (window is 4x the game resolution)
// WindowTitle:  "PIGO-8 Game"
// TargetFPS:    30
// ScreenWidth:  128    (PICO-8 default)
// ScreenHeight: 128
// Multiplayer:  false
// Fullscreen:   false
// DisableHiDPI: true   (better performance for pixel art)
Using Custom Settings
func main() {
    settings := p8.NewSettings()
    settings.WindowTitle = "My Awesome Game"
    settings.TargetFPS = 60
    settings.ScaleFactor = 6

    p8.InsertGame(&game{})
    p8.PlayGameWith(settings)
}
Setting Reference
| Setting | Type | Default | Description |
|---|---|---|---|
ScaleFactor | int | 4 | Window size multiplier (4 = 512×512 window for 128×128 game) |
WindowTitle | string | "PIGO-8 Game" | Title shown in window bar |
TargetFPS | int | 30 | Frames per second (30 or 60 recommended) |
ScreenWidth | int | 128 | Logical game width in pixels |
ScreenHeight | int | 128 | Logical game height in pixels |
Fullscreen | bool | false | Start in fullscreen mode |
Multiplayer | bool | false | Enable networking features |
DisableHiDPI | bool | true | Disable HiDPI scaling (better for pixel art) |
Custom Resolution
PIGO8 isn't limited to 128×128. Try these classic resolutions:
// Game Boy (160×144)
settings.ScreenWidth = 160
settings.ScreenHeight = 144

// NES (256×240)
settings.ScreenWidth = 256
settings.ScreenHeight = 240

// Commodore 64 (320×200)
settings.ScreenWidth = 320
settings.ScreenHeight = 200
Fullscreen Mode
settings.Fullscreen = true
Press Alt+Enter (or Cmd+Enter on macOS) to toggle fullscreen at runtime.
Reading Screen Dimensions
In your game code, get the current screen size:
func (g *game) Draw() {
    width := p8.GetScreenWidth()   // Returns 128 by default
    height := p8.GetScreenHeight() // Returns 128 by default

    // Center something on screen
    centerX := width / 2
    centerY := height / 2
}
Complete Example: Game Boy Style
package main

import p8 "github.com/drpaneas/pigo8"

type game struct{}

func (g *game) Init()   {}
func (g *game) Update() {}

func (g *game) Draw() {
    p8.Cls(0)
    p8.Print("game boy!", 52, 70, 3)
}

func main() {
    settings := p8.NewSettings()
    settings.ScreenWidth = 160
    settings.ScreenHeight = 144
    settings.WindowTitle = "Game Boy Style"
    settings.ScaleFactor = 4

    p8.InsertGame(&game{})
    p8.PlayGameWith(settings)
}
Graphics Overview
PIGO8's graphics system is designed for simplicity: a fixed-size screen, a limited color palette, and immediate-mode drawing.
Coordinate System
The screen uses a standard 2D coordinate system:
- (0, 0) is the top-left corner
- X increases to the right
- Y increases downward
- Default size is 128×128 pixels
(0,0) ────────────────► X (127,0)
  │
  │
  │
  │
  ▼
  Y
(0,127)                 (127,127)
Drawing Order
PIGO8 uses immediate-mode rendering. Each frame:
- Call
Cls()to clear the screen - Draw background elements first
- Draw foreground elements on top
- Draw UI elements last
Later draws appear on top of earlier draws—like painting on a canvas.
func (g *game) Draw() {
    p8.Cls(0)                    // 1. Clear (black background)
    p8.Map()                     // 2. Background tiles
    p8.Spr(1, g.playerX, g.playerY) // 3. Player sprite
    p8.Print(g.score, 2, 2, 7)   // 4. UI on top
}
The 16-Color Palette
PIGO8 uses a 16-color palette by default (the PICO-8 palette):
| Index | Color | Hex | Index | Color | Hex |
|---|---|---|---|---|---|
| 0 | Black | #000000 | 8 | Red | #FF004D |
| 1 | Dark Blue | #1D2B53 | 9 | Orange | #FFA300 |
| 2 | Dark Purple | #7E2553 | 10 | Yellow | #FFEC27 |
| 3 | Dark Green | #008751 | 11 | Green | #00E436 |
| 4 | Brown | #AB5236 | 12 | Blue | #29ADFF |
| 5 | Dark Gray | #5F574F | 13 | Indigo | #83769C |
| 6 | Light Gray | #C2C3C7 | 14 | Pink | #FF77A8 |
| 7 | White | #FFF1E8 | 15 | Peach | #FFCCAA |
Use color indices (0-15) in all drawing functions.
Graphics Functions Summary
| Function | Purpose |
|---|---|
Cls(color) | Clear screen |
Pset(x, y, color) | Draw single pixel |
Pget(x, y) | Read pixel color |
Rect(), Rectfill() | Draw rectangles |
Circ(), Circfill() | Draw circles |
Line() | Draw lines |
Print() | Draw text |
Spr() | Draw sprites |
Sspr() | Draw sprite regions |
Map() | Draw tile maps |
Screen Functions
Cls - Clear Screen
Cls(colorIndex) fills the entire screen with a single color.
func (g *game) Draw() {
    p8.Cls(0)   // Clear to black
    // ... draw everything else
}
Always call Cls at the start of Draw. Otherwise, you'll see ghosting from the previous frame.
Parameters
| Parameter | Type | Default | Description |
|---|---|---|---|
| colorIndex | int | 0 | Color index (0-15) |
Examples
p8.Cls()     // Clear to black (color 0)
p8.Cls(1)    // Clear to dark blue
p8.Cls(12)   // Clear to blue
ClsRGBA - Clear with Custom Color
For colors outside the palette, use ClsRGBA:
import "image/color"

func (g *game) Draw() {
    p8.ClsRGBA(color.RGBA{R: 50, G: 50, B: 80, A: 255})
    // ...
}
Screen Dimensions
Get the current screen size at runtime:
width := p8.GetScreenWidth()   // Default: 128
height := p8.GetScreenHeight() // Default: 128
Useful for centering objects or handling custom resolutions:
func (g *game) Draw() {
    p8.Cls(0)

    // Center a message
    msg := "game over"
    x := (p8.GetScreenWidth() - len(msg)*4) / 2
    y := p8.GetScreenHeight() / 2
    p8.Print(msg, x, y, 8)
}
See Also
Colors and Palette
The Default Palette
PIGO8 starts with the classic PICO-8 palette:
| Index | Name | RGB | Description |
|---|---|---|---|
| 0 | Black | (0, 0, 0) | Used for transparency |
| 1 | Dark Blue | (29, 43, 83) | |
| 2 | Dark Purple | (126, 37, 83) | |
| 3 | Dark Green | (0, 135, 81) | |
| 4 | Brown | (171, 82, 54) | |
| 5 | Dark Gray | (95, 87, 79) | |
| 6 | Light Gray | (194, 195, 199) | |
| 7 | White | (255, 241, 232) | |
| 8 | Red | (255, 0, 77) | |
| 9 | Orange | (255, 163, 0) | |
| 10 | Yellow | (255, 236, 39) | |
| 11 | Green | (0, 228, 54) | |
| 12 | Blue | (41, 173, 255) | |
| 13 | Indigo | (131, 118, 156) | |
| 14 | Pink | (255, 119, 168) | |
| 15 | Peach | (255, 204, 170) |
Transparency
By default, color 0 (black) is transparent when drawing sprites. This means:
- Pixels with color 0 in your sprites won't be drawn
- You can layer sprites on top of each other
- Change transparency settings with
Palt()
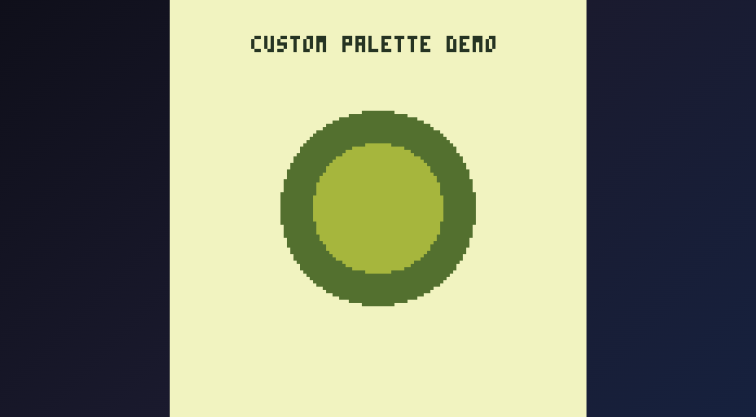
Custom Palettes (palette.hex)
Load palettes from sites like Lospec:
- Download a palette in HEX format
- Save as
palette.hexin your project:
c60021
e70000
e76121
e7a263
e7c384
- PIGO8 automatically loads it on startup
Note: Color 0 is always transparent, and color 1 becomes white. Your hex colors start at index 2.
Palette Functions
SetPaletteColor
Change a single color at runtime:
import "image/color"

func (g *game) Init() {
    // Make color 8 a custom blue
    p8.SetPaletteColor(8, color.RGBA{0, 100, 200, 255})
}
GetPaletteColor
Read the current color at an index:
col := p8.GetPaletteColor(8) // Returns color.Color
SetPalette
Replace the entire palette:
import "image/color"

func (g *game) Init() {
    grayscale := []color.Color{
        color.RGBA{0, 0, 0, 255},       // Black
        color.RGBA{85, 85, 85, 255},    // Dark gray
        color.RGBA{170, 170, 170, 255}, // Light gray
        color.RGBA{255, 255, 255, 255}, // White
    }
    p8.SetPalette(grayscale)
}
GetPaletteSize
Get the number of colors:
count := p8.GetPaletteSize() // Returns 16 for default palette
See Also
Pixel Manipulation
Pset - Set Pixel
Draw a single pixel at (x, y):
p8.Pset(64, 64, 8)  // Red pixel at center
p8.Pset(10, 20)     // Use current draw color
Parameters
| Parameter | Type | Description |
|---|---|---|
| x | int | X coordinate |
| y | int | Y coordinate |
| color | int (optional) | Color index (0-15) |
Note: Unlike shape functions,
PsetandPgettakeintparameters, not generic Number types. Useint()to convert if needed.
Pget - Get Pixel
Read the color index at (x, y):
color := p8.Pget(64, 64) // Returns 0-15
Returns 0 if coordinates are out of bounds.
Use Cases
- Collision detection: Check if a pixel is a certain color
- Color picking: Find what color is at a position
- Procedural generation: Read and modify existing pixels
Example: Starfield
type game struct {
    stars [][2]int  // x, y pairs
}

func (g *game) Init() {
    // Create 50 random stars
    for i := 0; i < 50; i++ {
        x := p8.Rnd(128)
        y := p8.Rnd(128)
        g.stars = append(g.stars, [2]int{x, y})
    }
}

func (g *game) Draw() {
    p8.Cls(0)
    for _, star := range g.stars {
        // Random twinkle: white or light gray
        color := 7
        if p8.Rnd(10) < 3 {
            color = 6
        }
        p8.Pset(star[0], star[1], color)
    }
}
Color Function
Set the current draw color used by functions when no color is specified:
p8.Color(8)        // Set current color to red
p8.Pset(10, 10)    // Draws red (uses current color)
p8.Pset(20, 20, 12) // Draws blue (overrides current color)
See Also
Drawing Shapes
Rectangles
Rect - Outline Rectangle
p8.Rect(x1, y1, x2, y2, color)
Draws a 1-pixel outline rectangle from corner (x1, y1) to corner (x2, y2).
p8.Rect(10, 10, 50, 30, 7) // White outline
Rectfill - Filled Rectangle
p8.Rectfill(x1, y1, x2, y2, color)
Draws a filled rectangle.
p8.Rectfill(10, 10, 50, 30, 8) // Red filled rectangle
Circles
Circ - Outline Circle
p8.Circ(x, y, radius, color)
Draws a 1-pixel outline circle centered at (x, y).
p8.Circ(64, 64, 20, 12) // Blue circle at center, radius 20
Circfill - Filled Circle
p8.Circfill(x, y, radius, color)
Draws a filled circle.
p8.Circfill(64, 64, 20, 11) // Green filled circle
Lines
p8.Line(x1, y1, x2, y2, color)
Draws a line from (x1, y1) to (x2, y2).
p8.Line(0, 0, 127, 127, 7)    // Diagonal white line
p8.Line(64, 0, 64, 127, 5)    // Vertical gray line
Note: Unlike
RectandCirc, theLinefunction does not apply camera offset. If you're usingCamera()for scrolling, lines will remain fixed on screen.
Color Parameter
All shape functions accept an optional color parameter:
- With color: Uses the specified color
- Without color: Uses the current draw color (set by
Color()orCursor())
p8.Color(8)         // Set current color to red
p8.Rect(10, 10, 50, 30)  // Draws in red
p8.Rect(60, 10, 100, 30, 12)  // Draws in blue (override)
Example: Simple Scene
func (g *game) Draw() {
    p8.Cls(12)  // Sky blue background

    // Sun
    p8.Circfill(100, 20, 12, 10)  // Yellow sun

    // Ground
    p8.Rectfill(0, 100, 127, 127, 3)  // Dark green grass

    // House
    p8.Rectfill(40, 70, 80, 100, 4)   // Brown walls
    p8.Rectfill(55, 85, 65, 100, 5)   // Gray door

    // Roof (triangle using lines)
    p8.Line(35, 70, 60, 50, 8)   // Left roof edge
    p8.Line(60, 50, 85, 70, 8)   // Right roof edge
    p8.Line(35, 70, 85, 70, 8)   // Bottom edge
}
See Also
Text and Print
Print Function
p8.Print(value, x, y, color)
Draws text at (x, y). The value can be any type—it's converted to a string.
Parameters
| Parameter | Type | Description |
|---|---|---|
| value | any | Text or value to display |
| x | int | X coordinate (optional) |
| y | int | Y coordinate (optional) |
| color | int | Color index (optional) |
Examples
p8.Print("hello", 10, 10, 7)     // White text at (10, 10)
p8.Print(score, 10, 20, 11)      // Print an integer
p8.Print(3.14159, 10, 30, 9)     // Print a float
p8.Print(true, 10, 40, 8)        // Print a boolean
Flexible Arguments
Print supports multiple calling conventions:
// Position and color
p8.Print("text", 10, 20, 7)

// Position only (uses current color)
p8.Print("text", 10, 20)

// Color only (uses cursor position)
p8.Print("text", 12)

// No arguments (uses cursor position and color)
p8.Print("text")
Cursor Function
Set the text cursor position and color:
p8.Cursor(10, 20)      // Set position to (10, 20)
p8.Cursor(10, 20, 8)   // Set position and color
p8.Cursor()            // Reset to (0, 0)
After Print, the cursor moves down by one line (6 pixels).
Text Layout
Characters are 4 pixels wide (including spacing) and 6 pixels tall.
// Measure text width
text := "hello"
width := len(text) * 4  // 20 pixels

// Center text horizontally
x := (128 - width) / 2
p8.Print(text, x, 60, 7)
Return Values
Print returns the position after the text:
endX, endY := p8.Print("score: ", 10, 10, 7)
p8.Print(g.score, endX, 10, 11)  // Continue on same line
Example: Score Display
func (g *game) Draw() {
    p8.Cls(0)

    // Title
    p8.Print("SPACE SHOOTER", 30, 5, 7)

    // Score (right-aligned)
    scoreText := fmt.Sprintf("%05d", g.score)
    p8.Print("SCORE:", 85, 5, 6)
    p8.Print(scoreText, 105, 5, 11)

    // Lives
    p8.Print("LIVES:", 5, 5, 6)
    for i := 0; i < g.lives; i++ {
        p8.Spr(1, 30+i*10, 3)  // Heart sprites
    }
}
See Also
Palette Effects
Pal - Color Swapping
Pal remaps one color to another for all subsequent drawing operations.
Swap a Single Color
p8.Pal(8, 12) // Red (8) draws as blue (12)
Now when you draw something in color 8 (red), it appears as color 12 (blue).
Reset All Mappings
p8.Pal() // Reset to default (each color draws as itself)
Example: Character Variants
Use palette swapping to create color variants of the same sprite:
func (g *game) Draw() {
    p8.Cls(0)

    // Original player (red shirt)
    p8.Spr(1, 20, 60)

    // Player 2 (swap red to blue)
    p8.Pal(8, 12)
    p8.Spr(1, 60, 60)
    p8.Pal()  // Reset

    // Player 3 (swap red to green)
    p8.Pal(8, 11)
    p8.Spr(1, 100, 60)
    p8.Pal()  // Reset
}
Palt - Transparency Control
Palt controls which colors are treated as transparent when drawing sprites.
Make a Color Transparent
p8.Palt(8, true) // Red (8) becomes transparent
Make a Color Opaque
p8.Palt(0, false) // Black (0) is now drawn (not transparent)
Reset Transparency
p8.Palt() // Reset: only black (0) is transparent
Example: Glowing Effect
Make the background show through certain colors:
func (g *game) Draw() {
    p8.Cls(1)  // Dark blue background

    // Draw sprite normally
    p8.Spr(5, 40, 60)

    // Draw same sprite with yellow transparent (shows background)
    p8.Palt(10, true)  // Yellow transparent
    p8.Spr(5, 80, 60)
    p8.Palt()  // Reset
}
Combining Effects
Create powerful effects by combining Pal and Palt:
func (g *game) Draw() {
    p8.Cls(0)

    // Silhouette effect
    for i := 1; i <= 15; i++ {
        p8.Pal(i, 1)  // All colors become dark blue
    }
    p8.Spr(1, 50, 60)
    p8.Pal()

    // Normal sprite next to it
    p8.Spr(1, 70, 60)
}
Flash Effect on Damage
func (g *game) Draw() {
    p8.Cls(0)

    if g.playerDamageFrames > 0 {
        // Flash white when damaged
        for i := 0; i <= 15; i++ {
            p8.Pal(i, 7)
        }
        g.playerDamageFrames--
    }

    p8.Spr(g.playerSprite, g.playerX, g.playerY)
    p8.Pal()  // Always reset
}
See Also
Sprites Overview
Sprites are small images used for characters, objects, and tiles in your game. PIGO8 loads sprites from a spritesheet.json file.
The Spritesheet
A spritesheet is a grid of small images (typically 8×8 pixels each). In PICO-8 style, the sheet is 128×128 pixels containing 256 sprites in a 16×16 grid.
Sprite IDs:
 0  1  2  3  4  5  6  7  8  9 10 11 12 13 14 15
16 17 18 19 20 21 22 23 24 25 26 27 28 29 30 31
32 33 34 35 ...
spritesheet.json Format
{
  "version": "1.0",
  "description": "Game sprites",
  "sprites": [
    {
      "id": 1,
      "x": 8,
      "y": 0,
      "width": 8,
      "height": 8,
      "flags": 0,
      "pixels": "0000000001111110011111100111111001111110011111100111111000000000"
    }
  ]
}
Sprite Fields
| Field | Description |
|---|---|
id | Unique sprite number |
x, y | Position on the spritesheet (pixels) |
width, height | Dimensions (usually 8×8) |
flags | Bitfield for collision/layer filtering (0-255) |
pixels | Hex string of color indices |
Creating Sprites
PIGO8 Editor
Run the built-in editor:
go run github.com/drpaneas/pigo8/cmd/editor
From PICO-8
If you have existing PICO-8 games:
go run github.com/drpaneas/parsepico -input game.p8 -output .
This extracts spritesheet.json and map.json.
Manual Creation
Create sprites programmatically or use image editors and convert to the JSON format.
Sprite Functions Summary
| Function | Purpose |
|---|---|
Spr(n, x, y, ...) | Draw sprite n at position (x, y) |
Sspr(sx, sy, sw, sh, dx, dy, ...) | Draw arbitrary spritesheet region |
Sget(x, y) | Get pixel color from spritesheet |
Sset(x, y, c) | Set pixel color on spritesheet |
Fget(n, f) | Get sprite flag value |
Fset(n, f, v) | Set sprite flag value |
Drawing Sprites
Spr - Draw a Sprite
The most common way to draw sprites:
p8.Spr(spriteNumber, x, y)
p8.Spr(spriteNumber, x, y, width, height)
p8.Spr(spriteNumber, x, y, width, height, flipX)
p8.Spr(spriteNumber, x, y, width, height, flipX, flipY)
Parameters
| Parameter | Type | Default | Description |
|---|---|---|---|
| spriteNumber | int | required | Sprite ID from spritesheet |
| x | Number | required | Screen X position |
| y | Number | required | Screen Y position |
| width | float64 | 1.0 | Width in sprite units (1 = 8 pixels) |
| height | float64 | 1.0 | Height in sprite units |
| flipX | bool | false | Flip horizontally |
| flipY | bool | false | Flip vertically |
Basic Usage
// Draw sprite 1 at position (60, 60)
p8.Spr(1, 60, 60)

// Draw with float coordinates (for smooth movement)
p8.Spr(1, g.playerX, g.playerY)
Multi-Tile Sprites
Draw sprites that span multiple tiles:
// Draw a 2×2 sprite (16×16 pixels)
// This draws sprites 1, 2, 17, 18 as a block
p8.Spr(1, 50, 50, 2, 2)

// Draw a 1.5 width (12 pixels wide)
p8.Spr(1, 50, 50, 1.5, 1)
Flipping
Mirror sprites for left/right or up/down facing:
// Player facing right
p8.Spr(1, g.x, g.y)

// Player facing left (flip horizontally)
p8.Spr(1, g.x, g.y, 1, 1, true)

// Upside down
p8.Spr(1, g.x, g.y, 1, 1, false, true)
Animation Example
type game struct {
    frame     int
    animFrame int
}

func (g *game) Update() {
    g.frame++
    // Change animation frame every 8 game frames
    if g.frame % 8 == 0 {
        g.animFrame = (g.animFrame + 1) % 4
    }
}

func (g *game) Draw() {
    p8.Cls(0)
    // Sprites 1-4 are animation frames
    p8.Spr(1 + g.animFrame, 60, 60)
}
Transparency
By default, black pixels (color 0) are transparent. To change this:
// Make color 0 opaque (black is drawn)
p8.Palt(0, false)

// Make color 8 (red) transparent
p8.Palt(8, true)

// Reset to default
p8.Palt()
See Also
Arbitrary Sprite Regions
Sspr - Draw Spritesheet Region
Sspr draws any rectangular region from the spritesheet, with optional scaling and flipping.
p8.Sspr(sx, sy, sw, sh, dx, dy)
p8.Sspr(sx, sy, sw, sh, dx, dy, dw, dh)
p8.Sspr(sx, sy, sw, sh, dx, dy, dw, dh, flipX, flipY)
Parameters
| Parameter | Type | Default | Description |
|---|---|---|---|
| sx | int | required | Source X on spritesheet |
| sy | int | required | Source Y on spritesheet |
| sw | int | required | Source width (pixels) |
| sh | int | required | Source height (pixels) |
| dx | Number | required | Destination X on screen |
| dy | Number | required | Destination Y on screen |
| dw | float64 | sw | Destination width (pixels) |
| dh | float64 | sh | Destination height (pixels) |
| flipX | bool | false | Flip horizontally |
| flipY | bool | false | Flip vertically |
Basic Usage
// Draw 16×16 region from (8, 8) to screen at (50, 50)
p8.Sspr(8, 8, 16, 16, 50, 50)
Scaling
// Draw 8×8 source scaled to 32×32 on screen
p8.Sspr(0, 0, 8, 8, 50, 50, 32, 32)

// Draw 16×16 scaled down to 8×8
p8.Sspr(0, 0, 16, 16, 50, 50, 8, 8)
Use Cases
- Irregular sprite sizes: Characters that aren't 8×8
- Scaling: Boss sprites, zoom effects
- Partial sprites: Only show part of a larger image
Example: Stretched Logo
func (g *game) Draw() {
    p8.Cls(0)

    // Draw logo from spritesheet, scaled 2x
    p8.Sspr(0, 0, 32, 16, 32, 50, 64, 32)
}
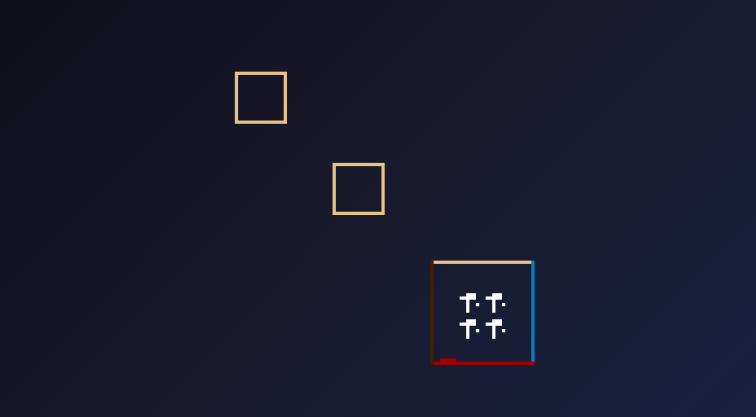
Sget / Sset - Spritesheet Pixels
Read and write individual pixels on the spritesheet.
Sget
colorIndex := p8.Sget(x, y) // Get pixel color (0-15)
Sset
p8.Sset(x, y, colorIndex) // Set pixel color
Example: Procedural Sprite
func (g *game) Init() {
    // Draw a random pattern on sprite 255 (position 127×127 on sheet)
    for y := 0; y < 8; y++ {
        for x := 0; x < 8; x++ {
            color := p8.Rnd(16)  // Random color
            p8.Sset(120+x, 120+y, color)
        }
    }
}
See Also
Sprite Flags
Each sprite has 8 flags (bits 0-7) that can be used for game logic—commonly for collision detection and layer filtering.
Flag Numbers
Flags are numbered 0-7 and accessed by their number, not by constants:
// Flag numbers (0-7) for use with Fget/Fset
// Flag 0: Often used for "solid/collision"
// Flag 1-7: Custom usage

// When used as a bitfield (for Map layers parameter):
// Flag 0 = 1, Flag 1 = 2, Flag 2 = 4, Flag 3 = 8
// Flag 4 = 16, Flag 5 = 32, Flag 6 = 64, Flag 7 = 128
Fget - Get Flag
Fget returns two values: a bitfield and a boolean.
bitfield, isSet := p8.Fget(spriteNumber, flagNumber)
Get All Flags (Bitfield)
When checking all flags, use the first return value:
allFlags, _ := p8.Fget(1) // Returns bitfield (0-255)
Check Specific Flag
When checking a specific flag, use the second return value:
_, isSolid := p8.Fget(1, 0) // Check if flag 0 is set on sprite 1
Important: Always use both return values appropriately. When checking a specific flag, ignore the first value with
_.
Fset - Set Flag
Set a Specific Flag
p8.Fset(1, 0, true)   // Set flag 0 on sprite 1
p8.Fset(1, 0, false)  // Clear flag 0 on sprite 1
Set All Flags at Once
p8.Fset(1, false)  // Clear all flags (bitfield = 0)
p8.Fset(1, true)   // Set all flags (bitfield = 255)
p8.Fset(1, 170)    // Set flags 1, 3, 5, 7 (binary: 10101010)
Common Use Cases
Collision Detection
Mark solid tiles with flag 0:
// In spritesheet.json, wall tiles have flags: 1
// In game code:
func (g *game) Update() {
    newX := g.playerX + g.dx

    // Check if destination tile is solid
    tileX := p8.Flr(newX / 8)
    tileY := p8.Flr(g.playerY / 8)
    spriteID := p8.Mget(tileX, tileY)

    _, isSolid := p8.Fget(spriteID, 0)
    if !isSolid {
        g.playerX = newX  // Allow movement
    }
}
Layer Filtering
Use flags to control which sprites appear:
func (g *game) Draw() {
    p8.Cls(0)

    // Draw background layer (flag 1)
    p8.Map(0, 0, 0, 0, 16, 16, 2)  // Only sprites with flag 1

    // Draw foreground layer (flag 2)
    p8.Map(0, 0, 0, 0, 16, 16, 4)  // Only sprites with flag 2
}
Collectible Items
Mark collectibles with a flag:
// Flag 1 = collectible
func (g *game) Update() {
    tileX := p8.Flr(g.playerX / 8)
    tileY := p8.Flr(g.playerY / 8)
    spriteID := p8.Mget(tileX, tileY)

    _, isCollectible := p8.Fget(spriteID, 1)
    if isCollectible {
        g.score++
        p8.Mset(tileX, tileY, 0)  // Remove collected item
    }
}
See Also
Maps Overview
Maps are grids of tiles that form levels, backgrounds, and game worlds. Each cell references a sprite by ID.
The Map Grid
In PICO-8 style, the default map is:
- 128 tiles wide × 128 tiles tall
- Each tile is 8×8 pixels
- Total: 1024×1024 pixels (when fully rendered)
Map coordinates (tiles):
(0,0)  (1,0)  (2,0)  ...  (127,0)
(0,1)  (1,1)  (2,1)  ...  (127,1)
  ...
(0,127)              ...  (127,127)
map.json Format
{
  "version": "1.0",
  "description": "Level 1",
  "width": 128,
  "height": 128,
  "name": "world1",
  "cells": [
    {"x": 0, "y": 0, "sprite": 1},
    {"x": 1, "y": 0, "sprite": 1},
    {"x": 2, "y": 0, "sprite": 2}
  ]
}
The cells array is sparse—only non-zero tiles are listed.
Map Functions Summary
| Function | Purpose |
|---|---|
Map(mx, my, sx, sy, w, h, layers) | Draw map tiles to screen |
Mget(x, y) | Get sprite ID at tile position |
Mset(x, y, sprite) | Set sprite ID at tile position |
Creating Maps
PIGO8 Editor
go run github.com/drpaneas/pigo8/cmd/editor
From PICO-8
go run github.com/drpaneas/parsepico -input game.p8 -output .
Procedural Generation
func (g *game) Init() {
    for y := 0; y < 16; y++ {
        for x := 0; x < 16; x++ {
            if p8.Rnd(10) < 2 {
                p8.Mset(x, y, 5)  // Random obstacles
            }
        }
    }
}
Drawing Maps
Map Function
p8.Map(mx, my, sx, sy, w, h, layers)
Draws a rectangular region of the map to the screen.
Parameters
| Parameter | Type | Default | Description |
|---|---|---|---|
| mx | int | 0 | Map X position (tiles) |
| my | int | 0 | Map Y position (tiles) |
| sx | int | 0 | Screen X position (pixels) |
| sy | int | 0 | Screen Y position (pixels) |
| w | int | 128 | Width to draw (tiles) |
| h | int | 128 | Height to draw (tiles) |
| layers | int | 0 | Flag bitfield for filtering (0 = all) |
Basic Usage
// Draw the entire visible area
p8.Map()

// Draw from map position (5, 10)
p8.Map(5, 10)

// Draw at screen position (10, 20)
p8.Map(0, 0, 10, 20)

// Draw a 16×16 tile area
p8.Map(0, 0, 0, 0, 16, 16)
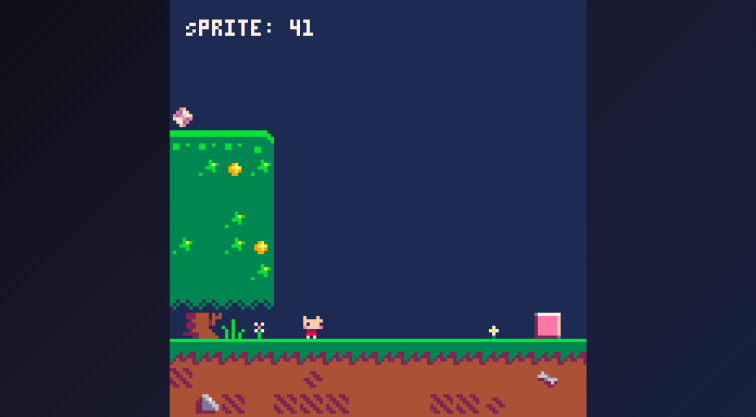
Scrolling
For a scrolling game, offset the map position:
func (g *game) Draw() {
    p8.Cls(0)

    // Calculate camera offset in tiles
    camX := int(g.playerX/8) - 8  // Center on player
    camY := int(g.playerY/8) - 8

    // Keep camera in bounds
    if camX < 0 { camX = 0 }
    if camY < 0 { camY = 0 }

    p8.Map(camX, camY, 0, 0, 16, 16)
}
Layer Filtering
Use the layers parameter to draw only sprites with specific flags:
func (g *game) Draw() {
    p8.Cls(0)

    // Draw background (sprites with flag 0 set = bit 1)
    p8.Map(0, 0, 0, 0, 16, 16, 1)

    // Draw player
    p8.Spr(g.playerSprite, g.playerX, g.playerY)

    // Draw foreground (sprites with flag 1 set = bit 2)
    p8.Map(0, 0, 0, 0, 16, 16, 2)
}
Pixel-Perfect Scrolling
For smooth scrolling at sub-tile precision, use the Camera function:
func (g *game) Draw() {
    p8.Cls(0)

    // Camera follows player with pixel precision
    p8.Camera(g.playerX - 64, g.playerY - 64)

    p8.Map()  // Map scrolls with camera
    p8.Spr(1, g.playerX, g.playerY)  // Player drawn in world coords

    // Draw UI without camera offset
    p8.Camera()  // Reset camera
    p8.Print(g.score, 2, 2, 7)
}
See Also
Map Data Access
Mget - Read Map Tile
spriteID := p8.Mget(column, row)
Returns the sprite ID at the specified tile position.
Parameters
| Parameter | Type | Description |
|---|---|---|
| column | int | X position in tiles (0-127) |
| row | int | Y position in tiles (0-127) |
Returns
- Sprite ID (0-255)
- Returns 0 for out-of-bounds coordinates
Example
// Check what's at tile (5, 10)
spriteID := p8.Mget(5, 10)
if spriteID == 0 {
    // Empty tile
}
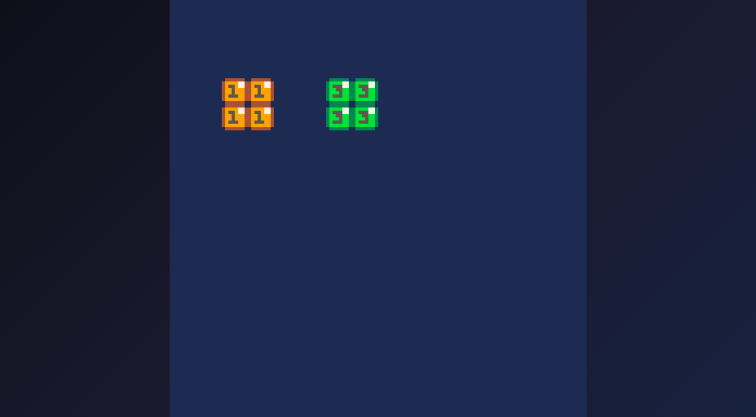
Mset - Write Map Tile
p8.Mset(column, row, spriteID)
Sets the sprite ID at the specified tile position.
Parameters
| Parameter | Type | Description |
|---|---|---|
| column | int | X position in tiles |
| row | int | Y position in tiles |
| spriteID | int | Sprite ID to place (0-255) |
Example
// Place sprite 5 at tile (10, 10)
p8.Mset(10, 10, 5)

// Clear a tile (set to empty)
p8.Mset(10, 10, 0)
Dynamic Maps
Destructible Terrain
func (g *game) Update() {
    if p8.Btnp(p8.X) {  // Fire button
        // Calculate tile in front of player
        tileX := p8.Flr((g.playerX + 8) / 8)
        tileY := p8.Flr(g.playerY / 8)

        spriteID := p8.Mget(tileX, tileY)
        _, isBreakable := p8.Fget(spriteID, 2)  // Flag 2 = breakable

        if isBreakable {
            p8.Mset(tileX, tileY, 0)  // Remove tile
            g.score += 10
        }
    }
}
Collectibles
func (g *game) Update() {
    // Player tile position
    tileX := p8.Flr(g.playerX / 8)
    tileY := p8.Flr(g.playerY / 8)

    spriteID := p8.Mget(tileX, tileY)

    // Sprite 10 = coin
    if spriteID == 10 {
        p8.Mset(tileX, tileY, 0)  // Remove coin
        g.coins++
        p8.Music(1)  // Coin sound
    }
}
Doors and Switches
// Pressing a switch opens a door
func (g *game) Update() {
    tileX := p8.Flr(g.playerX / 8)
    tileY := p8.Flr(g.playerY / 8)

    // Sprite 20 = switch
    if p8.Mget(tileX, tileY) == 20 && p8.Btnp(p8.X) {
        // Change switch sprite
        p8.Mset(tileX, tileY, 21)  // Activated switch

        // Open door at known position
        p8.Mset(g.doorX, g.doorY, 0)
    }
}
See Also
Keyboard Input
Button Constants
PIGO8 uses PICO-8 style button indices:
| Constant | Key | Index |
|---|---|---|
p8.LEFT | Arrow Left | 0 |
p8.RIGHT | Arrow Right | 1 |
p8.UP | Arrow Up | 2 |
p8.DOWN | Arrow Down | 3 |
p8.O | Z | 4 |
p8.X | X | 5 |
p8.ButtonStart | Enter | 6 |
p8.ButtonSelect | Tab | 7 |
Btn - Is Button Held?
if p8.Btn(p8.LEFT) {
    // Left arrow is currently pressed
    g.playerX--
}
Returns true every frame the button is held down.
Note:
Btn/Btnpaccept an optional player index (e.g.,Btn(p8.LEFT, 1)) for local multiplayer. Keyboard input always maps to player 0; players 1-7 read their own assigned gamepad instead. See Gamepad for details.
Continuous Movement
func (g *game) Update() {
    if p8.Btn(p8.LEFT)  { g.x-- }
    if p8.Btn(p8.RIGHT) { g.x++ }
    if p8.Btn(p8.UP)    { g.y-- }
    if p8.Btn(p8.DOWN)  { g.y++ }
}
Btnp - Was Button Just Pressed?
if p8.Btnp(p8.X) {
    // X button was just pressed this frame
    g.jump()
}
Returns true only on the first frame the button is pressed.
Menu Navigation
func (g *game) Update() {
    if p8.Btnp(p8.UP) {
        g.menuSelection--
    }
    if p8.Btnp(p8.DOWN) {
        g.menuSelection++
    }
    if p8.Btnp(p8.X) {
        g.selectMenuItem()
    }
}
Common Patterns
Movement with Speed
const speed = 2

func (g *game) Update() {
    if p8.Btn(p8.LEFT)  { g.x -= speed }
    if p8.Btn(p8.RIGHT) { g.x += speed }
    if p8.Btn(p8.UP)    { g.y -= speed }
    if p8.Btn(p8.DOWN)  { g.y += speed }
}
Jump with Btnp
func (g *game) Update() {
    // Ground check
    if g.onGround && p8.Btnp(p8.O) {
        g.velocityY = -5
        g.onGround = false
    }

    // Apply gravity
    g.velocityY += 0.2
    g.y += g.velocityY
}
Fire Rate Limiting
func (g *game) Update() {
    if g.fireCooldown > 0 {
        g.fireCooldown--
    }

    if p8.Btn(p8.X) && g.fireCooldown == 0 {
        g.shoot()
        g.fireCooldown = 10  // 10 frame cooldown
    }
}
See Also
Gamepad Support
PIGO8 automatically detects gamepads. The standard buttons work without any configuration.
Button Mapping
| PIGO8 Constant | Xbox Controller | PlayStation | Steam Deck |
|---|---|---|---|
p8.O | X | Square | X |
p8.X | A | X | A |
p8.ButtonStart | Menu | Options | Menu |
p8.ButtonSelect | View | Share | View |
Directional Input
D-pad and left analog stick both work for directional buttons:
// Works with keyboard arrows, D-pad, and analog stick
if p8.Btn(p8.LEFT)  { g.x-- }
if p8.Btn(p8.RIGHT) { g.x++ }
Additional Gamepad Buttons
For games needing more buttons:
| Constant | Description |
|---|---|
p8.ButtonJoyA | A button (Xbox layout) |
p8.ButtonJoypadB | B button |
p8.ButtonJoypadX | X button |
p8.ButtonJoypadY | Y button |
p8.ButtonJoypadL1 | Left shoulder |
p8.ButtonJoypadR1 | Right shoulder |
p8.ButtonJoypadL2 | Left trigger |
p8.ButtonJoypadR2 | Right trigger |
Steam Deck
PIGO8 includes specific support for Steam Deck:
- D-pad and analog stick work for movement
- Face buttons map to PIGO8 buttons
- Back buttons (L4, R4, L5, R5) are accessible
// Steam Deck back buttons
if p8.Btn(p8.ButtonJoypadL4) {
    // Left back button
}
Testing Gamepad
func (g *game) Draw() {
    p8.Cls(0)

    // Show button states
    y := 10
    for i := 0; i <= 5; i++ {
        color := 5  // Gray
        if p8.Btn(i) {
            color = 11  // Green
        }
        p8.Print(i, 10, y, color)
        y += 8
    }
}
Local Multiplayer
Btn/Btnp accept an optional player index (0-7) as their second argument for local
multiplayer with multiple gamepads on the same machine:
if p8.Btn(p8.LEFT, 0) { player0.x-- }  // player index 0's input
if p8.Btn(p8.LEFT, 1) { player1.x-- }  // player index 1's gamepad
Gamepads are assigned to players by ascending gamepad ID among the currently connected
gamepads - plugging in two controllers gives you players 0 and 1, in whatever order the OS
reports them (not necessarily physical plug-in order). With only one gamepad connected, it's
assigned to player 0 alongside the keyboard (both work simultaneously for player 0) - there's
no player 1 gamepad until a second one is connected. Mouse input is shared across all player
indices, since there's only one mouse. An out-of-range player index (negative, or greater than
7) returns false rather than erroring.
func (g *game) Update() {
    for player := range g.players {
        if p8.Btn(p8.LEFT, player)  { g.players[player].x-- }
        if p8.Btn(p8.RIGHT, player) { g.players[player].x++ }
    }
}
Mouse Input
Mouse Position
x, y := p8.GetMouseXY()
Returns the current mouse position in game coordinates.
Example: Cursor
func (g *game) Draw() {
    p8.Cls(0)

    mx, my := p8.GetMouseXY()
    p8.Circ(mx, my, 2, 7)  // Draw cursor
}
Mouse Buttons
| Constant | Button |
|---|---|
p8.ButtonMouseLeft | Left click |
p8.ButtonMouseRight | Right click |
p8.ButtonMouseMiddle | Middle click |
p8.ButtonMouseWheelUp | Scroll up |
p8.ButtonMouseWheelDown | Scroll down |
Click Detection
func (g *game) Update() {
    mx, my := p8.GetMouseXY()

    if p8.Btnp(p8.ButtonMouseLeft) {
        // Left mouse button just clicked
        g.handleClick(mx, my)
    }

    if p8.Btn(p8.ButtonMouseLeft) {
        // Left mouse button held (dragging)
        g.handleDrag(mx, my)
    }
}
Scroll Wheel
func (g *game) Update() {
    if p8.Btn(p8.ButtonMouseWheelUp) {
        g.zoom++
    }
    if p8.Btn(p8.ButtonMouseWheelDown) {
        g.zoom--
    }
}
Example: Paint Program
type game struct {
    lastX, lastY int
}

func (g *game) Update() {
    mx, my := p8.GetMouseXY()

    if p8.Btn(p8.ButtonMouseLeft) {
        // Draw line from last position to current
        p8.Line(g.lastX, g.lastY, mx, my, 7)
    }

    g.lastX = mx
    g.lastY = my
}
See Also
Audio
PIGO8 plays embedded WAV files named music0.wav, music1.wav, and so on.
Setting Up Audio
Add this line near the top of your main.go:
//go:generate go run github.com/drpaneas/pigo8/cmd/embedgen -dir .
Then run:
go generate
The generated embed.go registers your music*.wav files with PIGO8. Audio is loaded from registered embedded resources, so make sure you run go generate after adding or renaming audio files.
Playback APIs
p8.Music(n)              // Play audio file n
p8.Music(n, true)        // Play n exclusively (stops/rewinds other audio)
p8.MusicLoop(n)          // Play n in a loop
p8.MusicLoop(n, true)    // Loop n exclusively
p8.StopMusic(n)          // Stop a specific audio ID
p8.StopMusic(-1)         // Stop all audio
For advanced control, p8.MusicWithOptions(...) is also available.
Important Behavior
p8.Music(n, true)is exclusive playback. It does not enable looping.- Use
p8.MusicLoop(...)orp8.MusicWithOptions(..., p8.MusicOptions{Loop: true})for looping music. - Calling
p8.Music(n)again while the same ID is already playing does not restart it. Stop it first or use exclusive playback if you want to restart from the beginning. - The float32 APIs
p8.MusicF32,p8.MusicLoopF32, andp8.StopMusicF32exist for advanced use. The defaultp8.MusicAPIs are the simpler choice for most games. - The legacy and float32 APIs keep separate playback state. Use one family consistently for a given track session instead of assuming
StopMusic(...)will stop audio started withMusicF32(...).
Examples
// Play a one-shot sound effect.
p8.Music(1)

// Start looping background music and stop any other tracks.
p8.MusicLoop(0, true)

// Stop that looping track later.
p8.StopMusic(0)
func (g *game) Update() {
    if p8.Btnp(p8.O) {
        p8.Music(2) // Fire sound
    }

    if g.hitEnemy() {
        p8.Music(3) // Hit sound
    }
}

func (g *game) Init() {
    p8.MusicLoop(0, true)
}
Audio Tips
Short Sound Effects
Keep sound effects short for responsive gameplay.
Background Music
For looping tracks, edit the WAV so the start and end join cleanly.
Web Browsers
Browser autoplay policies require user interaction before audio starts. The web export handles this after the first button press.
See Also
Camera
The camera offsets all drawing operations, creating the illusion of a scrolling world.
Camera Function
p8.Camera(x, y)  // Set camera offset
p8.Camera()      // Reset to (0, 0)
When the camera is at (x, y), everything draws shifted by (-x, -y).
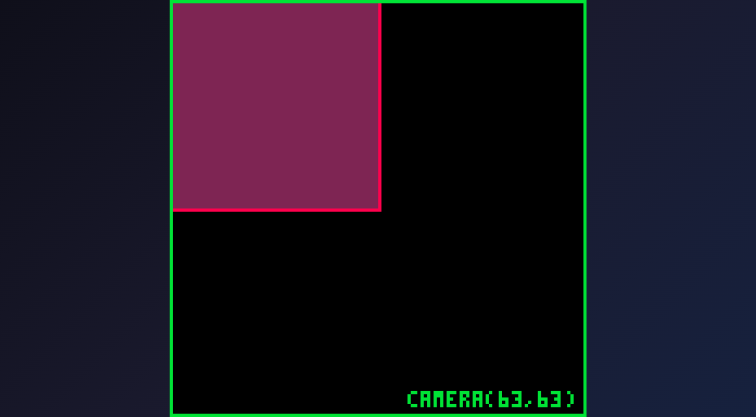
Following a Player
func (g *game) Draw() {
    p8.Cls(0)

    // Center camera on player
    camX := g.playerX - 64  // Center of 128-pixel screen
    camY := g.playerY - 64

    p8.Camera(camX, camY)

    // Draw world
    p8.Map()
    p8.Spr(1, g.playerX, g.playerY)  // Use world coordinates

    // Draw UI (reset camera first)
    p8.Camera()
    p8.Print("SCORE: " + fmt.Sprint(g.score), 2, 2, 7)
}
Camera Bounds
Keep the camera within map boundaries:
func (g *game) updateCamera() {
    // Target camera position
    camX := g.playerX - 64
    camY := g.playerY - 64

    // Clamp to map boundaries
    mapWidth := 128 * 8   // 128 tiles × 8 pixels
    mapHeight := 128 * 8

    if camX < 0 { camX = 0 }
    if camY < 0 { camY = 0 }
    if camX > mapWidth - 128 { camX = mapWidth - 128 }
    if camY > mapHeight - 128 { camY = mapHeight - 128 }

    g.camX = camX
    g.camY = camY
}
Smooth Camera
Add smoothing for a less jarring follow:
func (g *game) updateCamera() {
    targetX := g.playerX - 64
    targetY := g.playerY - 64

    // Smooth interpolation (10% per frame)
    g.camX += (targetX - g.camX) * 0.1
    g.camY += (targetY - g.camY) * 0.1
}
Screen Shake
Add impact effects:
func (g *game) Draw() {
    p8.Cls(0)

    // Apply shake offset
    shakeX := 0.0
    shakeY := 0.0
    if g.shakeFrames > 0 {
        shakeX = float64(p8.Rnd(5)) - 2
        shakeY = float64(p8.Rnd(5)) - 2
        g.shakeFrames--
    }

    p8.Camera(g.camX + shakeX, g.camY + shakeY)
    // ... draw world
}
See Also
Color Collision
Check if a pixel on the screen matches a specific color.
ColorCollision Function
p8.ColorCollision(x, y, colorIndex) bool
Returns true if the pixel at (x, y) is the specified color.
Parameters
| Parameter | Type | Description |
|---|---|---|
| x | Number | Screen X coordinate |
| y | Number | Screen Y coordinate |
| colorIndex | int | Color to check (0-15) |
Example
func (g *game) Update() {
    newX := g.playerX + g.dx

    // Check if player would hit a wall (color 3)
    if p8.ColorCollision(newX, g.playerY, 3) {
        // Don't move
        return
    }

    g.playerX = newX
}
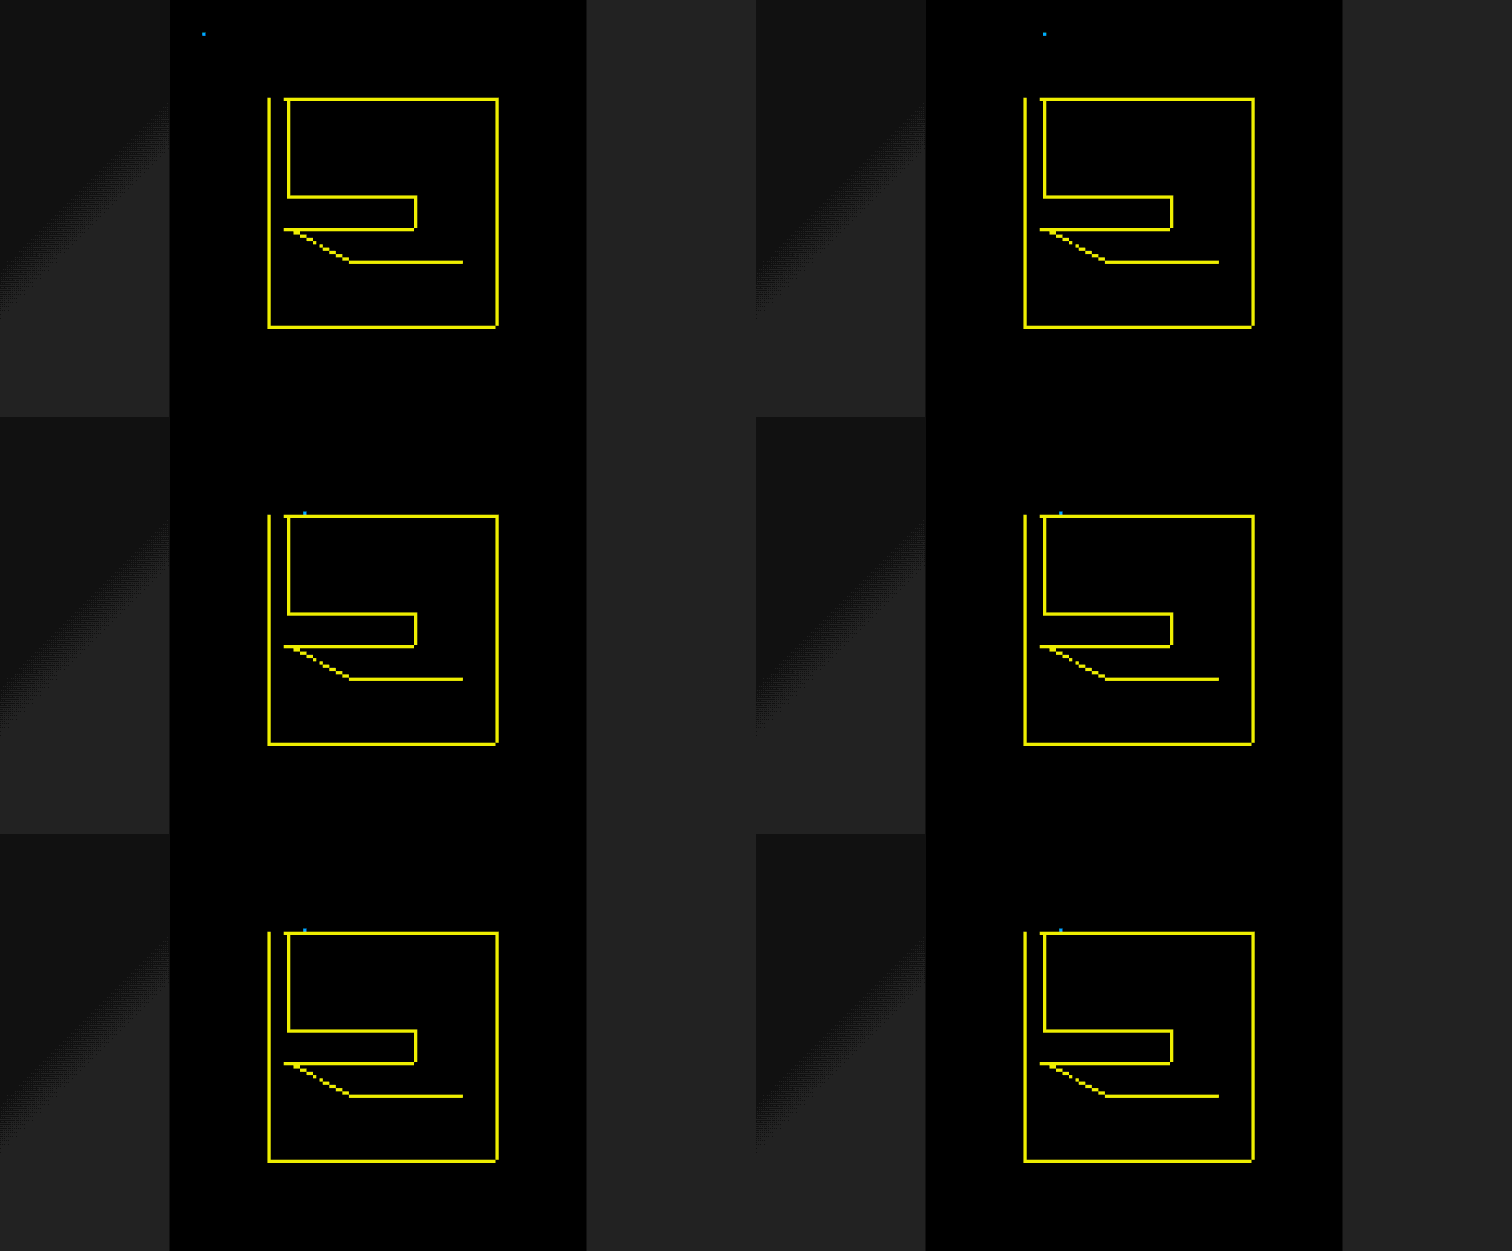
How It Works
- All objects are drawn to the screen
ColorCollisionreads the pixel color usingPget- Returns true if it matches the target color
Use Cases
- Simple platformer collision (walls are a specific color)
- Trigger zones (invisible areas using specific colors)
- Art-based collision shapes
Limitations
- Must draw before checking collision
- Only works with screen pixels (affected by camera)
- Single-pixel checks need multiple calls for bounding boxes
Full Bounding Box Check
func hitWall(x, y, w, h float64, wallColor int) bool {
    // Check corners and edges
    return p8.ColorCollision(x, y, wallColor) ||
           p8.ColorCollision(x+w, y, wallColor) ||
           p8.ColorCollision(x, y+h, wallColor) ||
           p8.ColorCollision(x+w, y+h, wallColor)
}
See Also
Map Collision
Check if a rectangular area overlaps with flagged map tiles.
MapCollision Function
p8.MapCollision(x, y, flag, width, height) bool
Returns true if any tile under the area has the specified flag set.
Parameters
| Parameter | Type | Default | Description |
|---|---|---|---|
| x | Number | required | Left edge (pixels) |
| y | Number | required | Top edge (pixels) |
| flag | int | required | Flag to check (0-7) |
| width | int | 8 | Area width (pixels) |
| height | int | 8 | Area height (pixels) |
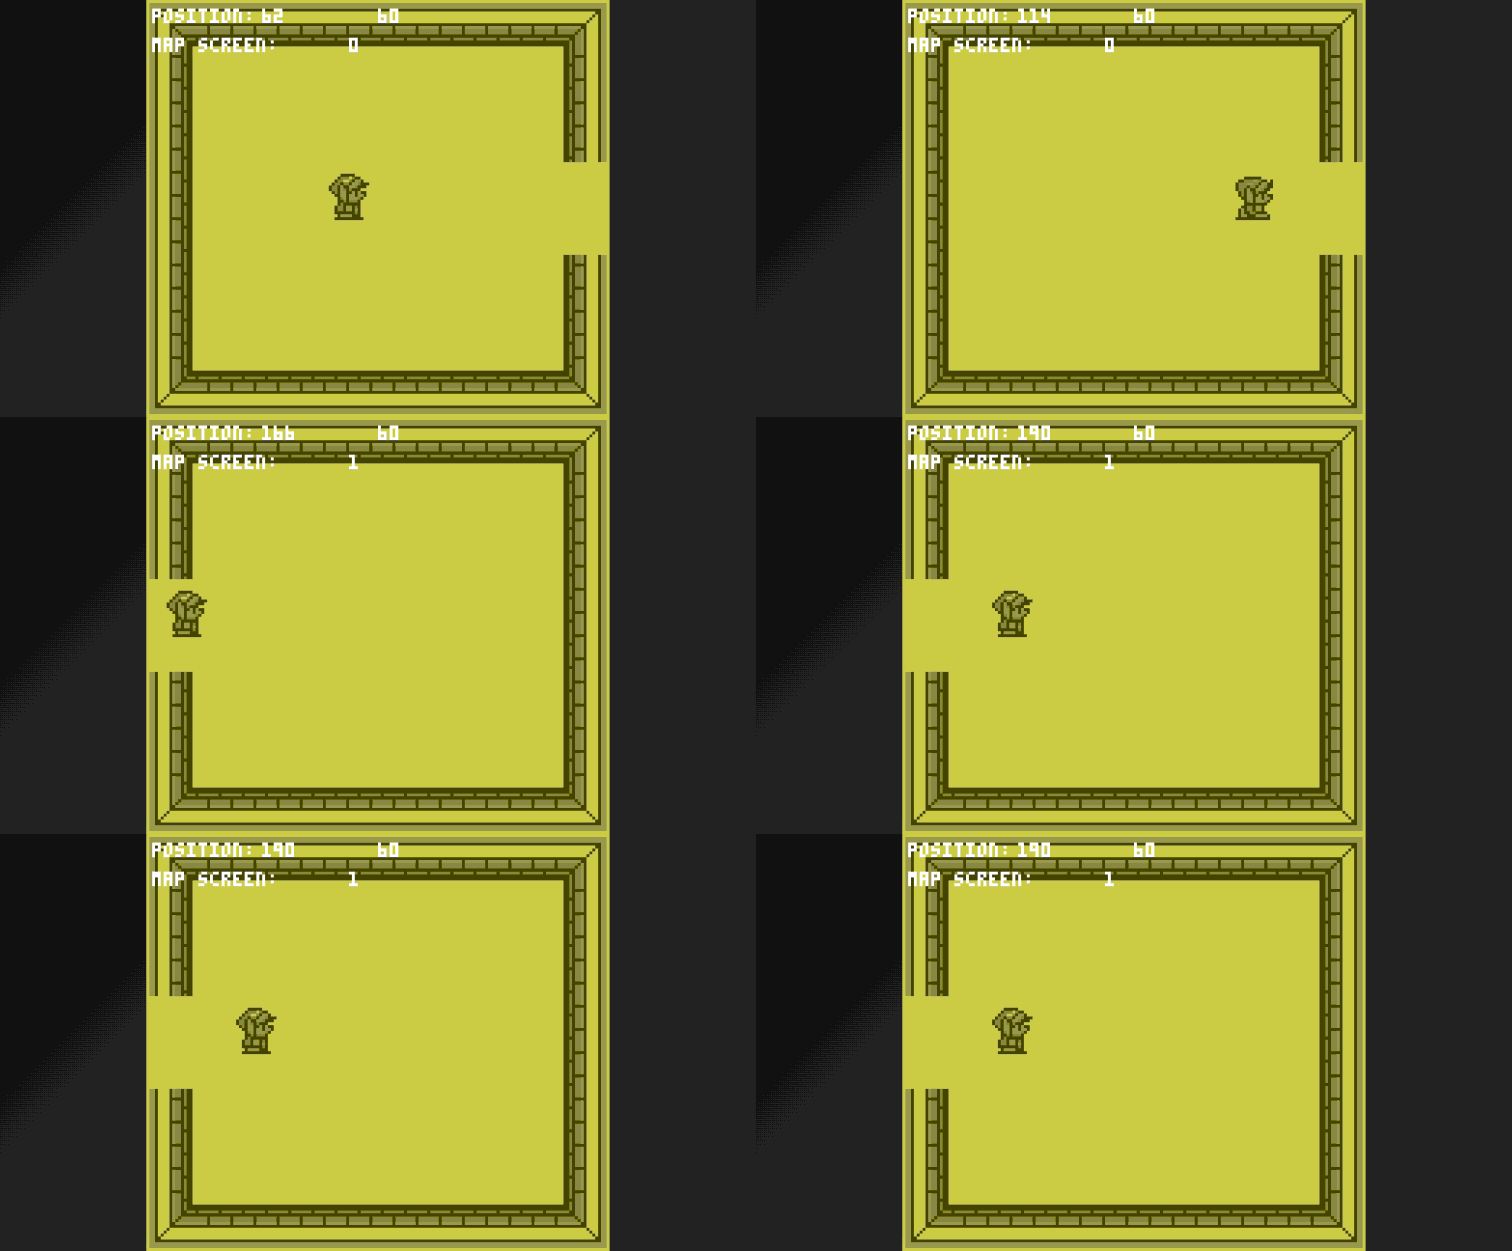
Basic Usage
// Check 8×8 area at player position
if p8.MapCollision(g.playerX, g.playerY, 0) {
    // Hit a tile with flag 0 (solid)
}
Custom Hitbox
// Player is 6×12 pixels
playerWidth := 6
playerHeight := 12
if p8.MapCollision(g.x, g.y, 0, playerWidth, playerHeight) {
    // Collision
}
Platformer Movement
func (g *game) Update() {
    // Horizontal movement
    newX := g.x + g.velocityX
    if !p8.MapCollision(newX, g.y, 0, 8, 8) {
        g.x = newX
    } else {
        g.velocityX = 0
    }

    // Vertical movement
    newY := g.y + g.velocityY
    if !p8.MapCollision(g.x, newY, 0, 8, 8) {
        g.y = newY
    } else {
        if g.velocityY > 0 {
            g.onGround = true
        }
        g.velocityY = 0
    }
}
Different Collision Types
Use different flags for different behaviors:
const (
    FlagSolid    = 0  // Can't pass through
    FlagPlatform = 1  // Pass through from below
    FlagHazard   = 2  // Damages player
    FlagWater    = 3  // Slows movement
)

func (g *game) Update() {
    // Check solid collision
    if p8.MapCollision(g.x, g.y+1, FlagSolid) {
        g.onGround = true
    }

    // Check hazards
    if p8.MapCollision(g.x, g.y, FlagHazard) {
        g.takeDamage()
    }

    // Check water (for movement speed)
    g.inWater = p8.MapCollision(g.x, g.y, FlagWater)
}
See Also
Math Functions
Flr - Floor
Round down to the nearest integer:
p8.Flr(1.9)   // Returns 1
p8.Flr(-1.1)  // Returns -2
p8.Flr(5)     // Returns 5
Common Uses
// Convert pixel position to tile position
tileX := p8.Flr(g.playerX / 8)
tileY := p8.Flr(g.playerY / 8)

// Grid snapping
snappedX := p8.Flr(g.x/8) * 8
Rnd - Random Number
Generate random integers:
p8.Rnd(10)    // Returns 0-9
p8.Rnd(6)     // Dice roll (0-5, add 1 for 1-6)
p8.Rnd(128)   // Random screen position
Examples
// Random position
x := p8.Rnd(128)
y := p8.Rnd(128)

// Random color
color := p8.Rnd(16)

// 50% chance
if p8.Rnd(2) == 0 {
    // Do something
}

// 1 in 100 chance
if p8.Rnd(100) == 0 {
    g.spawnEnemy()
}
Sqrt - Square Root
p8.Sqrt(16)   // Returns 4.0
p8.Sqrt(2)    // Returns ~1.414
p8.Sqrt(-1)   // Returns 0.0 (not NaN)
Distance Calculation
func distance(x1, y1, x2, y2 float64) float64 {
    dx := x2 - x1
    dy := y2 - y1
    return p8.Sqrt(dx*dx + dy*dy)
}
Sign - Get Sign
Returns -1 for negative numbers, 1 for zero or positive:
p8.Sign(5.0)    // Returns 1.0
p8.Sign(-3.0)   // Returns -1.0
p8.Sign(0.0)    // Returns 1.0 (not 0!)
Note:
Signtakes afloat64parameter and returnsfloat64. Zero is treated as positive, returning 1.
Use Case: Direction
// Move toward target
if g.x != targetX {
    g.x += p8.Sign(float64(targetX - g.x))
}
Time - Elapsed Time
Returns seconds since game started:
elapsed := p8.Time() // e.g., 10.5 seconds
Use Cases
// Animation timing
frame := int(p8.Time() * 10) % 4  // Cycle through 4 frames

// Spawn enemies every 5 seconds
if int(p8.Time()) % 5 == 0 && g.lastSpawn != int(p8.Time()) {
    g.spawnEnemy()
    g.lastSpawn = int(p8.Time())
}
T - Time Alias
p8.T() // Same as p8.Time()
See Also
Resource Embedding
Embed game assets into your binary for portable distribution.
Quick Setup
Add to the top of main.go:
//go:generate go run github.com/drpaneas/pigo8/cmd/embedgen -dir .
Then build:
go generate
go build
Your executable now includes all assets.
What Gets Embedded
The embedgen tool detects and embeds:
spritesheet.json- Sprite datamap.json- Map datapalette.hex- Custom palettemusic*.wav- Audio files
Manual Embedding
For custom control, create embed.go:
package main

import (
    "embed"
    p8 "github.com/drpaneas/pigo8"
)

//go:embed spritesheet.json map.json music0.wav music1.wav
var resources embed.FS

func init() {
    p8.RegisterEmbeddedResources(
        resources,
        "spritesheet.json",
        "map.json",
        "music0.wav",
        "music1.wav",
    )
}
Audio files passed to RegisterEmbeddedResources should still use the music%d.wav naming convention because the playback APIs address them by numeric ID.
Loading Priority
PIGO8 loads resources in this order:
- Current directory (highest priority)
- Common subdirectories:
assets/,resources/,data/,static/ - Embedded resources
- Library defaults (lowest priority)
This allows local files to override embedded resources during development.
Custom Palettes
Create palette.hex with hex colors:
c60021
e70000
e76121
e7a263
Color 0 is automatically transparent, colors shift to start at index 2.
Complete Example
Project structure:
my-game/
├── main.go
├── embed.go          # Auto-generated
├── spritesheet.json
├── map.json
├── palette.hex
└── music0.wav
main.go:
//go:generate go run github.com/drpaneas/pigo8/cmd/embedgen -dir .
package main

import p8 "github.com/drpaneas/pigo8"

type game struct{}

func (g *game) Init()   {}
func (g *game) Update() {}
func (g *game) Draw()   { p8.Cls(1) }

func main() {
    p8.InsertGame(&game{})
    p8.Play()
}
Build and distribute:
go generate
go build -o my-game
./my-game  # Works anywhere!
Web Export
Compile your game to WebAssembly for browser play.
Quick Export
go run github.com/drpaneas/pigo8/cmd/webexport -game ./your-game -o ./dist
Options
| Flag | Default | Description |
|---|---|---|
-game | (required) | Game directory path |
-o | ./web-build | Output directory |
-title | "PIGO-8 Game" | Browser title |
-serve | false | Start local server |
-port | 8080 | Server port |
Output Files
dist/
├── index.html    # Game page with virtual controls
├── game.wasm     # Compiled game
└── wasm_exec.js  # Go WASM runtime
Testing Locally
cd dist && python3 -m http.server 8080
Open http://localhost:8080
Or use the built-in server:
go run github.com/drpaneas/pigo8/cmd/webexport -game ./my-game -o ./dist -serve
Deployment
GitHub Pages
go run github.com/drpaneas/pigo8/cmd/webexport -game ./my-game -o ./docs
Enable Pages in repo settings, point to /docs.
itch.io
go run github.com/drpaneas/pigo8/cmd/webexport -game ./my-game -o ./dist
cd dist && zip -r ../game-web.zip .
Upload game-web.zip as HTML game.
Netlify / Vercel
Just deploy the output directory as a static site.
Mobile Support
The generated page includes touch controls:
- D-pad for movement
- A/B buttons for actions
- Haptic feedback on supported devices
The interface is styled like a Game Boy for nostalgia.
Audio Notes
Browser autoplay policies require user interaction before audio. The page handles this automatically—audio works after the first button press.
Customization
The generated index.html can be edited for custom styling:
- Change the Game Boy color scheme
- Add your own branding
- Modify button layout
- Add external links
Complete Workflow
# 1. Create your game
mkdir my-game && cd my-game
go mod init my-game
go get github.com/drpaneas/pigo8

# 2. Write game code (main.go)

# 3. Add resources (spritesheet.json, etc.)

# 4. Export to web
go run github.com/drpaneas/pigo8/cmd/webexport -game . -o ./dist -title "My Game"

# 5. Test locally
cd dist && python3 -m http.server 8080

# 6. Deploy to your favorite hosting
Testing Your Game
PIGO8 games are plain Go structs implementing the Cartridge interface, so standard Go testing
applies directly to your game logic - the trick is keeping logic that can be tested (movement,
collision, state transitions) separate from code that can only run inside the game loop
(Draw() calls, which require an active screen).
Testing Logic Decoupled from Update/Draw
Structure gameplay logic as plain methods that don't call PIGO8 drawing functions, so they can be tested without running the game loop:
type Player struct {
	X, Y  float64
	Score int
}

// Move is pure logic - no p8 calls - so it's directly testable.
func (p *Player) Move(dx, dy float64) {
	p.X += dx
	p.Y += dy
	if p.X < 0 {
		p.X = 0
	}
}
func TestPlayerMove(t *testing.T) {
	p := &Player{X: 5, Y: 5}
	p.Move(-10, 0)
	if p.X != 0 {
		t.Errorf("expected X to clamp at 0, got %v", p.X)
	}
}
Your Cartridge.Update() method then becomes a thin adapter that reads input and calls these
tested methods:
func (g *game) Update() {
	var dx, dy float64
	if p8.Btn(p8.LEFT) {
		dx = -1
	}
	if p8.Btn(p8.RIGHT) {
		dx = 1
	}
	g.player.Move(dx, dy)
}
Testing Collision Logic
Collision helpers like p8.MapCollision and p8.ColorCollision need an initialized screen/map,
so wrap your collision decisions in testable functions instead of testing the PIGO8 calls
themselves:
// canMoveTo is pure logic given a collision check result - test this directly.
func canMoveTo(hitWall bool, isJumping bool) bool {
	return !hitWall || isJumping
}

func TestCanMoveTo(t *testing.T) {
	if canMoveTo(true, false) {
		t.Error("should not be able to move into a wall while not jumping")
	}
	if !canMoveTo(true, true) {
		t.Error("should be able to move through a wall while jumping")
	}
}
Testing State Transitions
Model game states as an enum and test transitions independently of rendering:
type State int

const (
	StateMenu State = iota
	StatePlaying
	StateGameOver
)

func nextState(current State, playerHealth int, startPressed bool) State {
	switch current {
	case StateMenu:
		if startPressed {
			return StatePlaying
		}
	case StatePlaying:
		if playerHealth <= 0 {
			return StateGameOver
		}
	}
	return current
}

func TestNextState_GameOverOnZeroHealth(t *testing.T) {
	got := nextState(StatePlaying, 0, false)
	if got != StateGameOver {
		t.Errorf("expected StateGameOver, got %v", got)
	}
}
Running Tests
Standard Go tooling works as expected:
go test ./...
go test -run TestPlayerMove -v
go test -cover ./...
What Not to Unit Test
Don't try to unit test Draw() itself, or functions that call drawing primitives (Spr,
Rect, Cls, etc.) directly - they require an active Ebitengine screen and are better verified
visually by running the game (go run .) or via the Web Export for quick
browser checks.
PIGO8 Editor
The PIGO8 editor is an extremely minimal tool that allows you to create and edit sprites and maps for your PIGO8 games. This documentation covers how to install, run, and use the editor effectively.
Try the editor live in your browser - no installation required. The browser version can't write to disk, so your sprites and map only exist for the current session (reloading the page resets everything); use it to explore the interface, and install it locally (below) for real project work.
Installation
To install the PIGO8 editor, you need to have Go installed on your system. If you haven't installed Go yet, please refer to the Installation guide.
Once Go is installed, you can install the PIGO8 editor with the following command:
go install github.com/drpaneas/pigo8/cmd/editor@latest
This will download and compile the editor, making it available as a command-line tool in your system.
Running the Editor
After installation, you can run the editor with the following command:
editor
By default, the editor opens with a 128x128 pixel map viewport (the standard PICO-8 resolution)
in Map Editor mode. You can customize the initial viewport size with the -w and -h flags:
editor -w 640 -h 480
Note: -w/-h set the initial size of the map viewport in pixels, not the overall window
size - the actual editor window is larger, since it also includes the spritesheet panel and
sprite editing tools alongside the map viewport, and the whole window is scaled up 3x for
visibility. Since Map Editor mode supports live panning and zooming (see
Panning and Zooming below), these flags mostly matter for the initial
view - you can freely adjust your framing interactively once the editor is open, so you rarely
need them.
Editor Interface
The editor has two main modes:
- Sprite Editor: For creating and editing individual sprites
- Map Editor: For arranging sprites into a game map
Switching Between Modes
You can switch between the sprite editor and map editor by pressing the X key on your keyboard. The current mode is displayed at the top of the editor window.
Sprite Editor
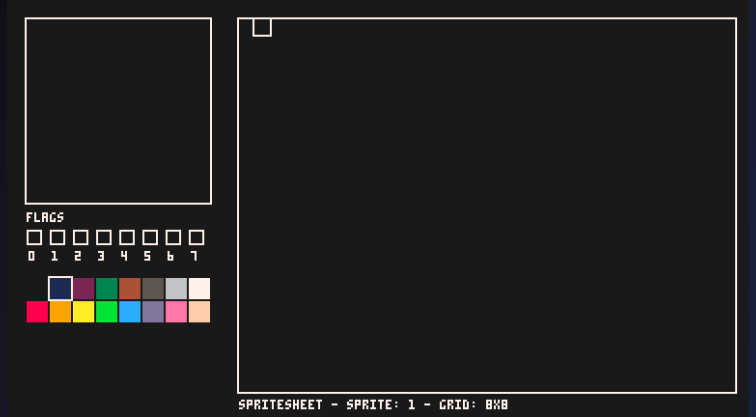
The sprite editor allows you to create and modify individual sprites pixel by pixel. Each sprite is 8x8 pixels in size, matching the PICO-8 standard.
Drawing
Click and drag on the pixel grid to draw:
- Left mouse button: paints the hovered pixel with the currently selected color.
- Right mouse button: erases the hovered pixel (sets it to color 0/transparent).
Choosing a Color
Click any swatch in the color palette (below the pixel grid) to make it the active drawing color. The currently selected color is highlighted with a border (white, or dark blue if you've loaded a custom, non-default palette).
Multi-Sprite Editing
The editor supports multi-sprite editing with different grid sizes. You can toggle between grid sizes using the mouse wheel:
- 8x8 (1 sprite)
- 16x16 (4 sprites in a 2x2 grid)
- 32x32 (16 sprites in a 4x4 grid)
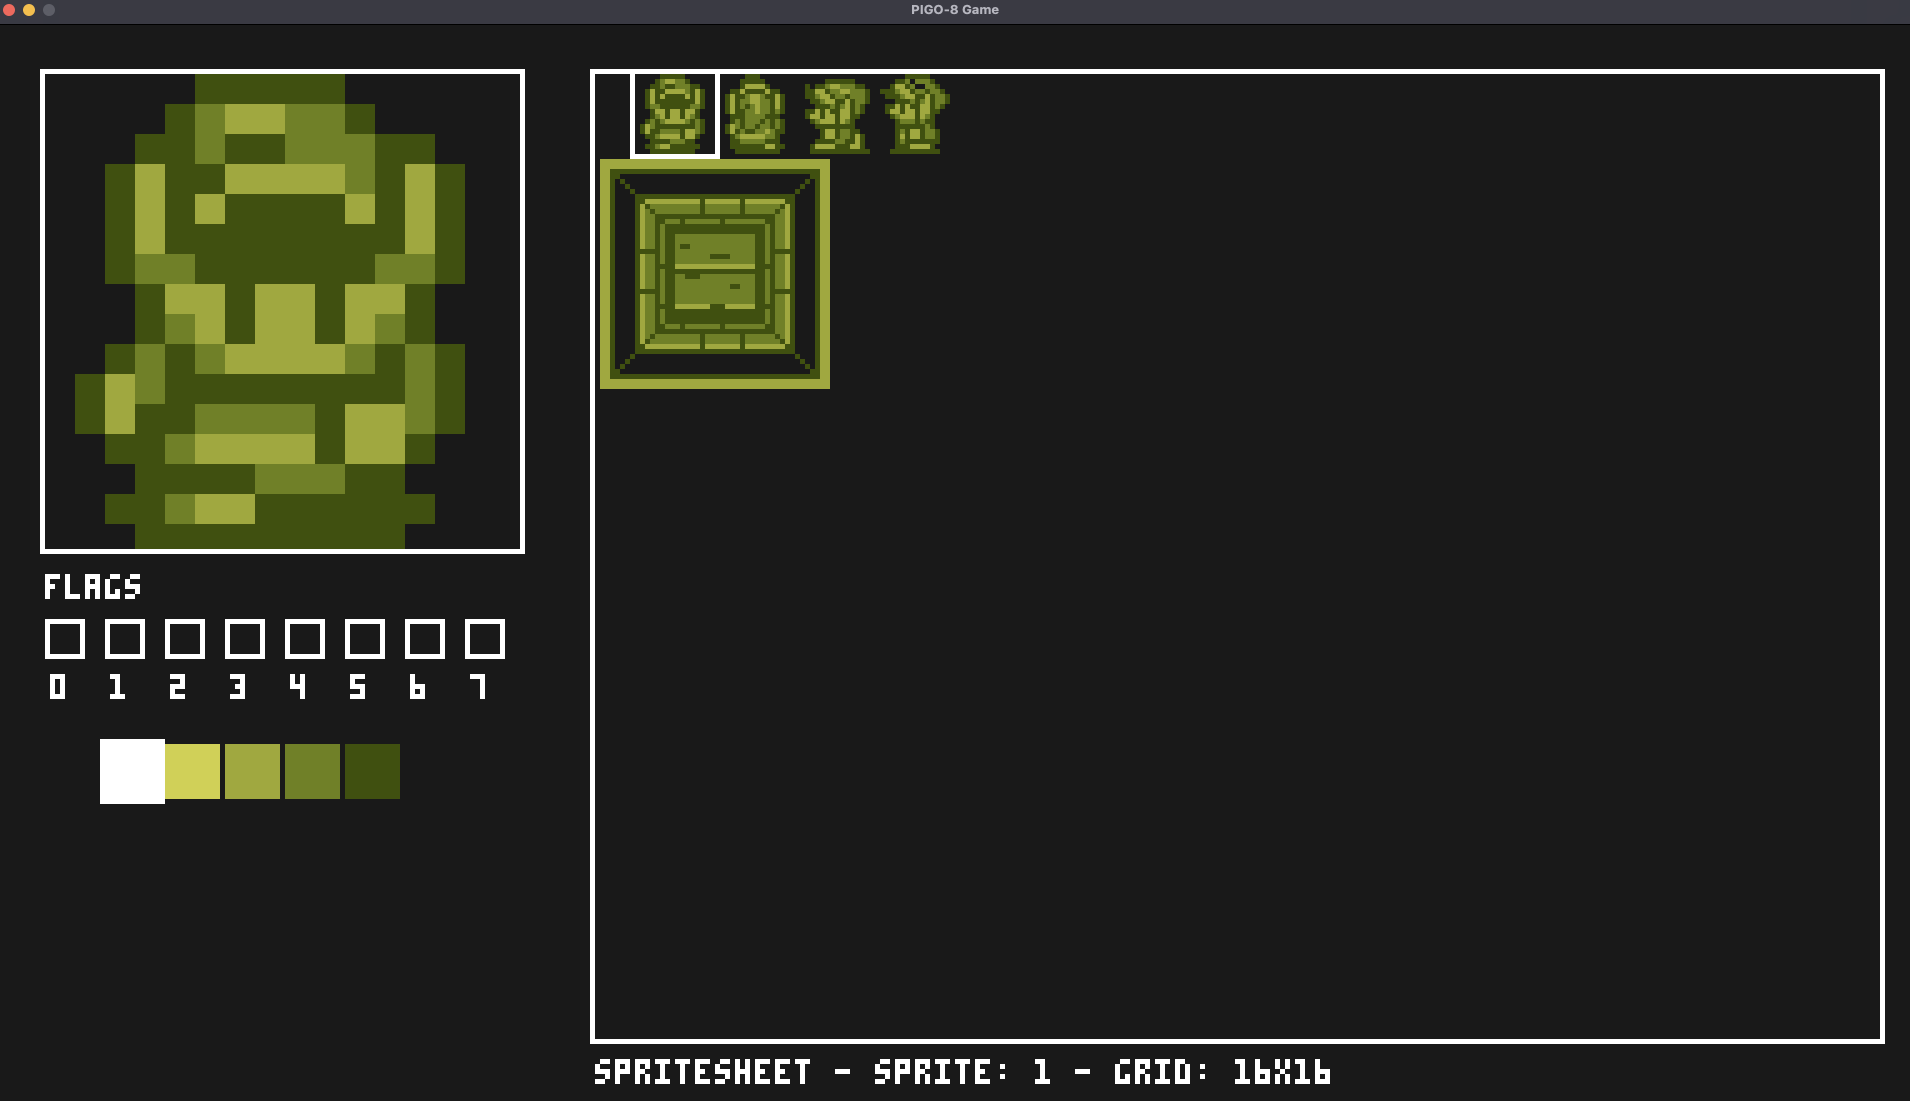
This feature allows you to work on larger sprites or sprite collections as a single unit, with proper mapping to the corresponding individual sprites.
Sprite Flags
Each sprite can have up to 8 flags (Flag0-Flag7) that can be used for game logic (like collision detection, animation states, etc.). You can toggle these flags in the editor interface.
When working with multi-sprite selections, flag changes apply to all selected sprites, with visual indication of mixed flag states when not all selected sprites have the same flag value.
Navigating Sprites
Click any tile in the spritesheet panel to make it the active sprite, or use the arrow keys to move to an adjacent sprite. Sprite 0 is reserved (it represents "no tile" on the map) and can't be selected as the active drawing sprite, either by clicking or with the arrow keys.
Copy & Paste
Copy the current sprite's pixel data and paste it onto another sprite:
- Cmd+C (macOS) / Ctrl+C (Windows/Linux): copy the current sprite.
- Cmd+V / Ctrl+V: paste onto the current sprite.
Map Editor
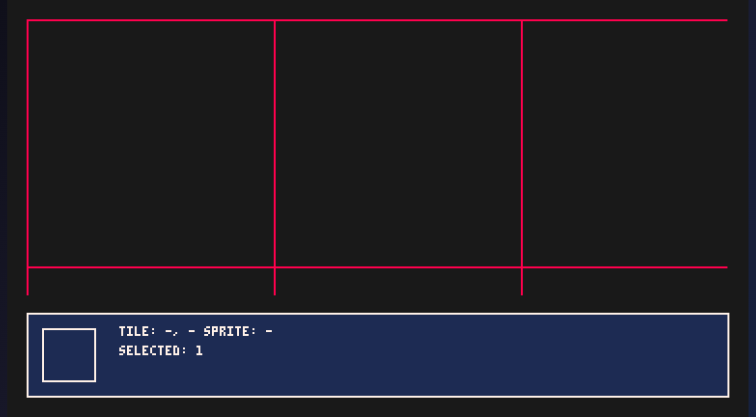
The map editor allows you to arrange sprites into a game map. The full map is 320x320 tiles, much larger than what's visible on screen at once - use panning and zooming (below) to navigate it.
Placing and Erasing Tiles
- Left mouse button: places the currently selected sprite (or sprite block, if using a multi-sprite grid size) at the hovered tile.
- Right mouse button: erases the tile under the cursor (sets it back to sprite 0).
The bottom info strip shows the tile coordinates and sprite under your cursor, alongside a preview of the sprite currently selected for placement.
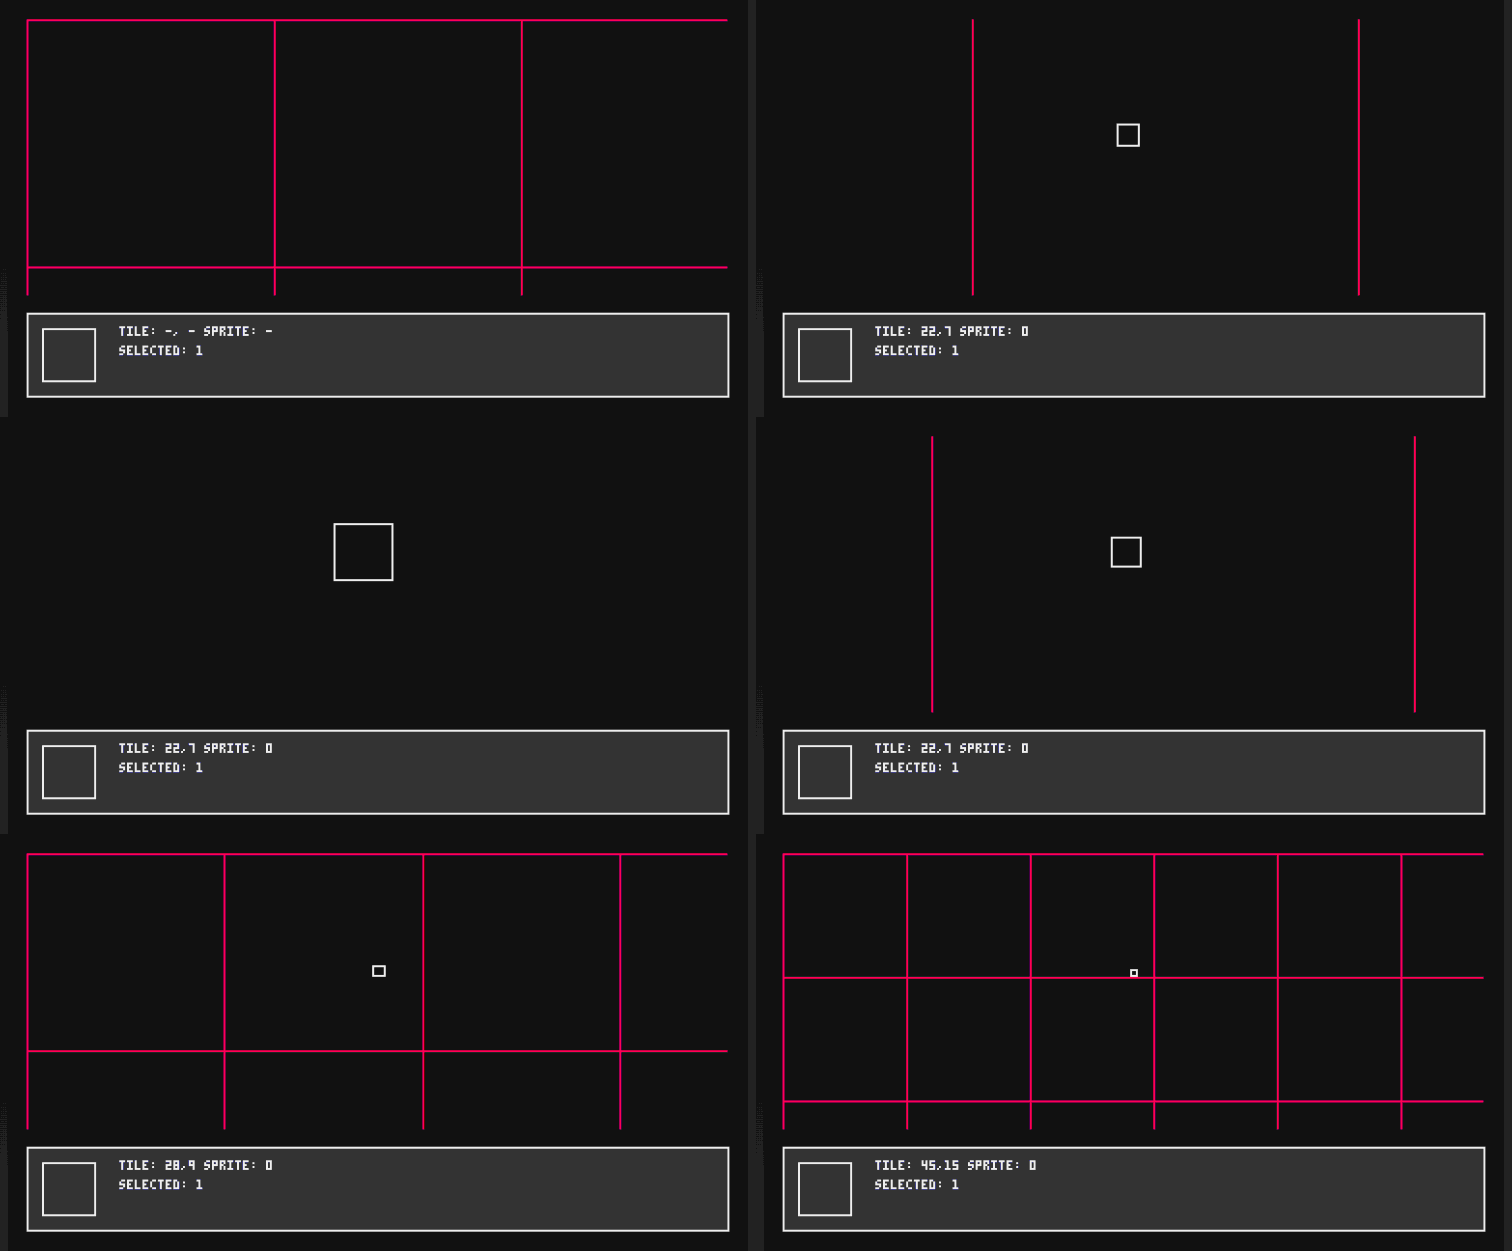
Panning and Zooming
- Arrow keys or W/A/S/D: pan the camera around the map.
- Middle mouse button (drag): pan the camera by dragging.
- Mouse wheel: zoom in/out (roughly 0.5x-4x).
Scene Boundaries
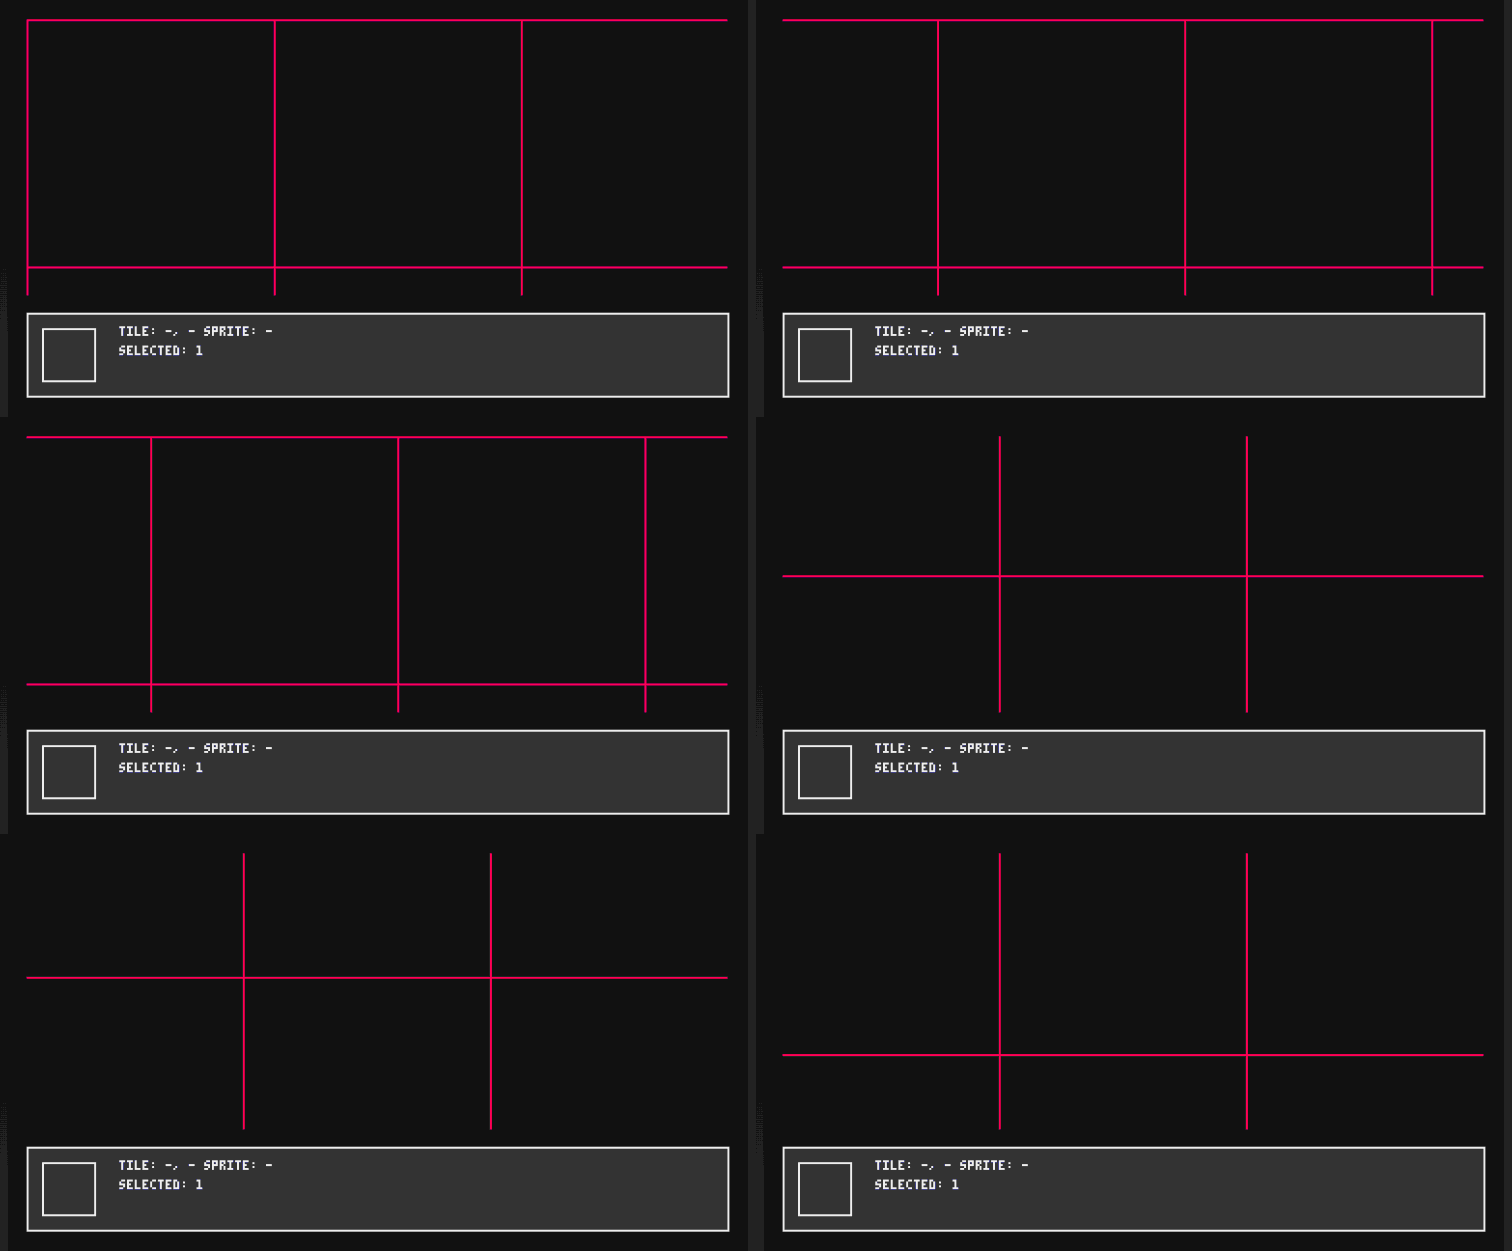
Red grid lines are drawn every 16 tiles, marking out PICO-8-style "screens" - useful as a visual guide when designing camera-based screen transitions (see the Camera guide), even though PIGO8 doesn't enforce any actual boundary at these lines.
Undo & Redo
The editor keeps a history of your edits (up to the last 50 states) in both Sprite Editor and Map Editor modes:
- Cmd+Z (macOS) / Ctrl+Z (Windows/Linux): undo.
- Cmd+Shift+Z / Ctrl+Shift+Z: redo.
Making a new edit after undoing clears the redo history, matching standard undo/redo behavior in most editors.
Saving and Loading
Your work is saved to two files:
spritesheet.json: Contains all your spritesmap.json: Contains your map data
These files are compatible with the PIGO8 library and can be loaded directly into your games.
The editor writes spritesheet.json/map.json to disk every time you switch between Sprite
Editor and Map Editor (X), and immediately whenever you toggle a sprite flag. Individual
pixel edits and map tile placements are not written to disk as you make them - only undo/redo
history is tracked continuously (in memory). Switch modes at least once (even briefly) after a
drawing session to make sure your latest edits are actually persisted to disk before closing the
editor.
Keyboard & Mouse Shortcuts
| Input | Function | Mode |
|---|---|---|
X | Switch between Sprite Editor and Map Editor | Both |
| Left click | Draw pixel / place sprite | Both |
| Right click | Erase pixel / erase tile | Both |
| Arrow keys | Navigate sprites | Sprite Editor |
Arrow keys / W A S D | Pan camera | Map Editor |
| Middle mouse (drag) | Pan camera | Map Editor |
| Mouse wheel | Change grid size (Sprite Editor) / zoom (Map Editor) | Both |
| Click a palette swatch | Select drawing color | Sprite Editor |
| Click a checkbox | Toggle sprite flag | Sprite Editor |
Cmd/Ctrl + Z | Undo | Both |
Cmd/Ctrl + Shift + Z | Redo | Both |
Cmd/Ctrl + C | Copy current sprite | Sprite Editor |
Cmd/Ctrl + V | Paste onto current sprite | Sprite Editor |
Command Line Options
| Flag | Description | Default |
|---|---|---|
| -w | Initial map viewport width in pixels (rounded down to a multiple of 8) | 128 |
| -h | Initial map viewport height in pixels (rounded down to a multiple of 8) | 128 |
Example Usage
# Run editor with default settings
editor

# Run editor with a larger initial map viewport
editor -w 640 -h 480
Next Steps
After creating your sprites and maps with the editor, you can use them in your PIGO8 games. See the Resource Embedding guide for details on how to include these resources in your game.
Building for Other Platforms (Cross-Compilation) and WebAssembly
Once you’ve confirmed your game runs locally, Go’s built-in cross-compilation makes it trivial to produce binaries for Windows, macOS, Linux—even for embedded ARM devices—and even WebAssembly for the browser. You don’t need any extra toolchain setup beyond Go itself.
Cross-compiling for Native Architectures
Go uses two environment variables to target a specific OS and CPU architecture:
-
GOOS: target operating system (linux,windows,darwinfor macOS, etc.) -
GOARCH: target CPU architecture (amd64,386,arm64,arm, etc.)
From your project folder, simply run:
# Linux on AMD64
GOOS=linux   GOARCH=amd64 go build -o mygame-linux-amd64

# Windows on 386 (32-bit)
GOOS=windows GOARCH=386  go build -o mygame-windows-386.exe

# macOS on ARM64 (Apple Silicon)
GOOS=darwin  GOARCH=arm64 go build -o mygame-darwin-arm64

# Linux on ARM (e.g. Raspberry Pi)
GOOS=linux   GOARCH=arm   go build -o mygame-linux-arm
You can mix and match any supported GOOS/GOARCH. The output binary name (-o) is up to you.
No extra downloads: Go’s standard distribution already contains everything needed.
To see all valid pairs, run:
$ go tool dist list
So you PIGO8 can run in the following computers:
aix/ppc64
android/386
android/amd64
android/arm
android/arm64
darwin/amd64
darwin/arm64
dragonfly/amd64
freebsd/386
freebsd/amd64
freebsd/arm
freebsd/arm64
freebsd/riscv64
illumos/amd64
ios/amd64
ios/arm64
js/wasm
linux/386
linux/amd64
linux/arm
linux/arm64
linux/loong64
linux/mips
linux/mips64
linux/mips64le
linux/mipsle
linux/ppc64
linux/ppc64le
linux/riscv64
linux/s390x
netbsd/386
netbsd/amd64
netbsd/arm
netbsd/arm64
openbsd/386
openbsd/amd64
openbsd/arm
openbsd/arm64
openbsd/ppc64
openbsd/riscv64
plan9/386
plan9/amd64
plan9/arm
solaris/amd64
wasip1/wasm
windows/386
windows/amd64
windows/arm64
By the way, since PIGO8 uses Ebiten, you can also build against Nintendo Switch if you like.
Building for WebAssembly
Go can compile to WebAssembly, letting you embed your pigo8 game in a webpage. Here’s how:
First, please set target to JavaScript/WASM:
$ GOOS=js GOARCH=wasm go build -o main.wasm
Then copy the Go runtime support file. The Go distribution includes a small JavaScript shim (wasm_exec.js) that initializes the WebAssembly module. You can find it in your Go root:
$ cp "$(go env GOROOT)/misc/wasm/wasm_exec.js" .
Ok, now let's make it loading into a web browser. So we need to create a simple HTML.
Save this as index.html alongside main.wasm and wasm_exec.js (all three of them in the same folder):
<!DOCTYPE html>
<html>
<head>
  <meta charset="utf-8">
  <title>My pigo8 Game</title>
  <script src="wasm_exec.js"></script>
  <script>
    const go = new Go();
    WebAssembly.instantiateStreaming(fetch("main.wasm"), go.importObject)
      .then((res) => go.run(res.instance))
      .catch(console.error);
  </script>
</head>
<body>
  <canvas id="ebiten_canvas"></canvas>
</body>
</html>
Now you can upload these to a web-server, or GitHub's actions for your repository and have people play your game. You can test it locally as well, You can use any static file server, for example Python’s:
$ python3 -m http.server 8080
Then open http://localhost:8080 in your browser.
With just these environment variables and a tiny HTML wrapper, you can ship your pigo8-powered game to nearly any platform—including the web—without touching C toolchains or external build systems.
Enjoy spreading your PICO-8 magic far and wide!
PIGO8 Multiplayer Networking Guide
Table of Contents
- Introduction
- Networking Architecture
- Setting Up a Multiplayer Game
- Network Callbacks
- Message Types and Data Structures
- Client-Side Prediction
- Case Study: Multiplayer Gameboy
- Advanced Topics
- Troubleshooting
Introduction
PIGO8 provides a built-in networking system that allows developers to add multiplayer functionality to their games. This guide will walk you through the process of converting a single-player game to multiplayer, with a focus on the Gameboy example.
The networking system in PIGO8 uses UDP for low-latency communication, making it suitable for real-time games. It follows a client-server architecture where one instance of the game acts as the server and other instances connect as clients.
Networking Architecture
Client-Server Model
PIGO8 uses a client-server architecture for multiplayer games:
- Server: Authoritative source of game state, processes game logic
- Clients: Send inputs to the server, receive and display game state
UDP Protocol
PIGO8 uses UDP (User Datagram Protocol) for networking:
- Advantages: Lower latency, better for real-time games
- Challenges: No guaranteed delivery, packets may arrive out of order
Network Roles
Each instance of a PIGO8 game can have one of two roles:
- Server: Hosts the game, processes game logic, broadcasts game state
- Client: Connects to server, sends inputs, receives game state
Setting Up a Multiplayer Game
Step 1: Initialize Network Roles
First, modify your game structure to include network-related fields:
type Game struct {
    // Existing game fields

    // Network-related fields
    isServer        bool
    isClient        bool
    remotePlayerID  string
    lastStateUpdate time.Time
}

func (g *Game) Init() {
    // Existing initialization code

    // Set up network roles
    g.isServer = p8.GetNetworkRole() == p8.RoleServer
    g.isClient = p8.GetNetworkRole() == p8.RoleClient
    g.lastStateUpdate = time.Now()
}
Step 2: Register Network Callbacks
In your main() function, register the network callbacks before starting the game:
func main() {
    // Create and initialize the game
    game := &Game{}
    p8.InsertGame(game)
    game.Init()

    // Register network callbacks
    p8.SetOnGameStateCallback(handleGameState)
    p8.SetOnPlayerInputCallback(handlePlayerInput)
    p8.SetOnConnectCallback(handlePlayerConnect)
    p8.SetOnDisconnectCallback(handlePlayerDisconnect)

    // Start the game
    settings := p8.NewSettings()
    settings.WindowTitle = "PIGO8 Multiplayer Game"
    p8.PlayGameWith(settings)
}
Step 3: Modify Game Loop for Network Play
Update your game's Update() function to handle network roles:
func (g *Game) Update() {
    // Handle waiting for players state
    if p8.IsWaitingForPlayers() {
        return
    }

    // Server-specific logic
    if g.isServer {
        // Process game physics, AI, etc.

        // Send game state updates
        if time.Since(g.lastStateUpdate) > 16*time.Millisecond {
            g.sendGameState()
            g.lastStateUpdate = time.Now()
        }
    }

    // Client-specific logic
    if g.isClient {
        // Send player input
        g.sendPlayerInput()

        // Client-side prediction (optional)
    }

    // Common logic for both client and server
}
Step 4: Add Network Status Display
Update your game's Draw() function to display network status:
func (g *Game) Draw() {
    p8.Cls(0)

    // Display network status
    if p8.IsWaitingForPlayers() || p8.GetNetworkError() != "" {
        p8.DrawNetworkStatus(10, 10, 7)
        return
    }

    // Draw game elements
    // ...
}
Network Callbacks
PIGO8 requires four callback functions for multiplayer functionality:
Game State Callback
Receives game state updates from the server:
func handleGameState(playerID string, data []byte) {
    game, ok := p8.CurrentCartridge().(*Game)
    if !ok {
        return
    }

    var state GameState
    if err := json.Unmarshal(data, &state); err != nil {
        log.Printf("Error unmarshaling game state: %v", err)
        return
    }

    // Update game state with received data
    // Example: Update player positions, game objects, etc.
}
Player Input Callback
Processes player input on the server:
func handlePlayerInput(playerID string, data []byte) {
    game, ok := p8.CurrentCartridge().(*Game)
    if !ok || !game.isServer {
        return
    }

    var input PlayerInput
    if err := json.Unmarshal(data, &input); err != nil {
        log.Printf("Error unmarshaling player input: %v", err)
        return
    }

    // Update game state based on player input
    // Example: Move remote player based on input
}
Connect Callback
Handles new player connections:
func handlePlayerConnect(playerID string) {
    game, ok := p8.CurrentCartridge().(*Game)
    if !ok || !game.isServer {
        return
    }

    // Handle new player connection
    // Example: Initialize player state, assign player ID
    log.Printf("Player connected: %s", playerID)
}
Disconnect Callback
Handles player disconnections:
func handlePlayerDisconnect(playerID string) {
    game, ok := p8.CurrentCartridge().(*Game)
    if !ok || !game.isServer {
        return
    }

    // Handle player disconnection
    // Example: Remove player from game
    log.Printf("Player disconnected: %s", playerID)
}
Message Types and Data Structures
Game State Structure
Define a structure for your game state:
type GameState struct {
    // Game state variables that need to be synchronized
    PlayerPositions map[string]Position
    GameObjects     []GameObject
    GameTime        float64
}

type Position struct {
    X float64
    Y float64
}

type GameObject struct {
    ID       int
    Position Position
    Type     int
    State    int
}
Player Input Structure
Define a structure for player input:
type PlayerInput struct {
    // Player input variables
    Up     bool
    Down   bool
    Left   bool
    Right  bool
    A      bool
    B      bool
    Start  bool
    Select bool
}
Sending Game State
Implement a function to send game state from server to clients:
func (g *Game) sendGameState() {
    if !g.isServer {
        return
    }

    // Create game state object
    state := GameState{
        PlayerPositions: make(map[string]Position),
        GameObjects:     make([]GameObject, 0),
        GameTime:        g.gameTime,
    }

    // Fill with current game state
    for id, player := range g.players {
        state.PlayerPositions[id] = Position{X: player.x, Y: player.y}
    }

    for i, obj := range g.gameObjects {
        state.GameObjects = append(state.GameObjects, GameObject{
            ID:       i,
            Position: Position{X: obj.x, Y: obj.y},
            Type:     obj.type,
            State:    obj.state,
        })
    }

    // Serialize and send
    data, err := json.Marshal(state)
    if err != nil {
        log.Printf("Error marshaling game state: %v", err)
        return
    }

    p8.SendMessage(p8.MsgGameState, "all", data)
}
Sending Player Input
Implement a function to send player input from client to server:
func (g *Game) sendPlayerInput() {
    if !g.isClient {
        return
    }

    // Create input object based on current button states
    input := PlayerInput{
        Up:     p8.Btn(p8.UP),
        Down:   p8.Btn(p8.DOWN),
        Left:   p8.Btn(p8.LEFT),
        Right:  p8.Btn(p8.RIGHT),
        A:      p8.Btn(p8.A),
        B:      p8.Btn(p8.B),
        Start:  p8.Btn(p8.START),
        Select: p8.Btn(p8.SELECT),
    }

    // Serialize and send
    data, err := json.Marshal(input)
    if err != nil {
        log.Printf("Error marshaling player input: %v", err)
        return
    }

    p8.SendMessage(p8.MsgPlayerInput, "", data)
}
Client-Side Prediction
Client-side prediction improves the feel of multiplayer games by immediately showing the results of player input locally, then reconciling with the server's authoritative state.
Implementing Prediction
// In client's Update() function
if g.isClient {
    // Send input to server
    g.sendPlayerInput()

    // Store current position
    originalX := g.localPlayer.x
    originalY := g.localPlayer.y

    // Apply input locally for immediate feedback
    if p8.Btn(p8.LEFT) {
        g.localPlayer.x -= g.playerSpeed
    }
    if p8.Btn(p8.RIGHT) {
        g.localPlayer.x += g.playerSpeed
    }
    if p8.Btn(p8.UP) {
        g.localPlayer.y -= g.playerSpeed
    }
    if p8.Btn(p8.DOWN) {
        g.localPlayer.y += g.playerSpeed
    }

    // Store prediction for reconciliation
    g.predictions = append(g.predictions, Prediction{
        Time:      g.gameTime,
        OriginalX: originalX,
        OriginalY: originalY,
        PredictedX: g.localPlayer.x,
        PredictedY: g.localPlayer.y,
    })
}
Reconciliation with Server State
// In handleGameState function
if game.isClient {
    // Get server's position for local player
    serverPos, ok := state.PlayerPositions[p8.GetPlayerID()]
    if !ok {
        return
    }

    // Calculate difference between prediction and server state
    diffX := math.Abs(game.localPlayer.x - serverPos.X)
    diffY := math.Abs(game.localPlayer.y - serverPos.Y)

    // If significant difference, smoothly correct
    if diffX > 5 || diffY > 5 {
        // Smooth interpolation
        game.localPlayer.x = game.localPlayer.x + (serverPos.X - game.localPlayer.x) * 0.3
        game.localPlayer.y = game.localPlayer.y + (serverPos.Y - game.localPlayer.y) * 0.3
    }

    // Update other players' positions directly
    for id, pos := range state.PlayerPositions {
        if id != p8.GetPlayerID() {
            if player, ok := game.players[id]; ok {
                player.x = pos.X
                player.y = pos.Y
                game.players[id] = player
            } else {
                // Create new player if not exists
                game.players[id] = Player{x: pos.X, y: pos.Y}
            }
        }
    }
}
Case Study: Multiplayer Gameboy
Let's convert the Gameboy example to a multiplayer game where two players can move around the screen.
Step 1: Define Game Structures
type Player struct {
    x      float64
    y      float64
    sprite int
    speed  float64
}

type Game struct {
    // Game world
    map        [][]int
    tileSize   float64

    // Players
    players    map[string]Player
    localPlayer Player

    // Network
    isServer        bool
    isClient        bool
    lastStateUpdate time.Time
}
Step 2: Define Network Messages
type GameState struct {
    Players map[string]PlayerState
}

type PlayerState struct {
    X      float64
    Y      float64
    Sprite int
}

type PlayerInput struct {
    Up     bool
    Down   bool
    Left   bool
    Right  bool
    A      bool
    B      bool
}
Step 3: Initialize Game with Network Roles
func (g *Game) Init() {
    // Initialize map and game world
    g.map = loadMap()
    g.tileSize = 8

    // Initialize players
    g.players = make(map[string]Player)

    // Set up network roles
    g.isServer = p8.GetNetworkRole() == p8.RoleServer
    g.isClient = p8.GetNetworkRole() == p8.RoleClient
    g.lastStateUpdate = time.Now()

    // Initialize local player
    g.localPlayer = Player{
        x:      64,
        y:      64,
        sprite: 1,
        speed:  1.0,
    }

    // Add local player to players map
    playerID := "server"
    if g.isClient {
        playerID = p8.GetPlayerID()
    }
    g.players[playerID] = g.localPlayer
}
Step 4: Implement Network Callbacks
func handleGameState(playerID string, data []byte) {
    game, ok := p8.CurrentCartridge().(*Game)
    if !ok {
        return
    }

    var state GameState
    if err := json.Unmarshal(data, &state); err != nil {
        log.Printf("Error unmarshaling game state: %v", err)
        return
    }

    // Update all players except local player
    for id, playerState := range state.Players {
        if game.isClient && id == p8.GetPlayerID() {
            // For local player, apply reconciliation
            diffX := math.Abs(game.localPlayer.x - playerState.X)
            diffY := math.Abs(game.localPlayer.y - playerState.Y)

            if diffX > 5 || diffY > 5 {
                // Smooth interpolation
                game.localPlayer.x = game.localPlayer.x + (playerState.X - game.localPlayer.x) * 0.3
                game.localPlayer.y = game.localPlayer.y + (playerState.Y - game.localPlayer.y) * 0.3

                // Update players map
                game.players[id] = game.localPlayer
            }
        } else {
            // For remote players, update directly
            game.players[id] = Player{
                x:      playerState.X,
                y:      playerState.Y,
                sprite: playerState.Sprite,
                speed:  1.0,
            }
        }
    }
}

func handlePlayerInput(playerID string, data []byte) {
    game, ok := p8.CurrentCartridge().(*Game)
    if !ok || !game.isServer {
        return
    }

    var input PlayerInput
    if err := json.Unmarshal(data, &input); err != nil {
        log.Printf("Error unmarshaling player input: %v", err)
        return
    }

    // Get player or create if not exists
    player, ok := game.players[playerID]
    if !ok {
        player = Player{
            x:      64,
            y:      64,
            sprite: 2, // Different sprite for client
            speed:  1.0,
        }
    }

    // Update player based on input
    if input.Left {
        player.x -= player.speed
    }
    if input.Right {
        player.x += player.speed
    }
    if input.Up {
        player.y -= player.speed
    }
    if input.Down {
        player.y += player.speed
    }

    // Apply collision detection
    player = game.applyCollision(player)

    // Update player in map
    game.players[playerID] = player
}

func handlePlayerConnect(playerID string) {
    game, ok := p8.CurrentCartridge().(*Game)
    if !ok || !game.isServer {
        return
    }

    // Initialize new player
    game.players[playerID] = Player{
        x:      64,
        y:      64,
        sprite: 2, // Different sprite for client
        speed:  1.0,
    }

    log.Printf("Player connected: %s", playerID)
}

func handlePlayerDisconnect(playerID string) {
    game, ok := p8.CurrentCartridge().(*Game)
    if !ok || !game.isServer {
        return
    }

    // Remove player
    delete(game.players, playerID)

    log.Printf("Player disconnected: %s", playerID)
}
Step 5: Implement Game Update Logic
func (g *Game) Update() {
    // Handle waiting for players state
    if p8.IsWaitingForPlayers() {
        return
    }

    // Update local player based on input
    if g.isServer {
        // Server controls its local player
        originalX := g.localPlayer.x
        originalY := g.localPlayer.y

        if p8.Btn(p8.LEFT) {
            g.localPlayer.x -= g.localPlayer.speed
        }
        if p8.Btn(p8.RIGHT) {
            g.localPlayer.x += g.localPlayer.speed
        }
        if p8.Btn(p8.UP) {
            g.localPlayer.y -= g.localPlayer.speed
        }
        if p8.Btn(p8.DOWN) {
            g.localPlayer.y += g.localPlayer.speed
        }

        // Apply collision detection
        g.localPlayer = g.applyCollision(g.localPlayer)

        // Update player in map
        g.players["server"] = g.localPlayer

        // Send game state to clients
        if time.Since(g.lastStateUpdate) > 16*time.Millisecond {
            g.sendGameState()
            g.lastStateUpdate = time.Now()
        }
    } else if g.isClient {
        // Client controls its local player with prediction
        originalX := g.localPlayer.x
        originalY := g.localPlayer.y

        if p8.Btn(p8.LEFT) {
            g.localPlayer.x -= g.localPlayer.speed
        }
        if p8.Btn(p8.RIGHT) {
            g.localPlayer.x += g.localPlayer.speed
        }
        if p8.Btn(p8.UP) {
            g.localPlayer.y -= g.localPlayer.speed
        }
        if p8.Btn(p8.DOWN) {
            g.localPlayer.y += g.localPlayer.speed
        }

        // Apply collision detection
        g.localPlayer = g.applyCollision(g.localPlayer)

        // Update player in map
        g.players[p8.GetPlayerID()] = g.localPlayer

        // Send input to server
        g.sendPlayerInput()
    }
}
Step 6: Implement Send Functions
func (g *Game) sendGameState() {
    if !g.isServer {
        return
    }

    // Create game state object
    state := GameState{
        Players: make(map[string]PlayerState),
    }

    // Fill with current player states
    for id, player := range g.players {
        state.Players[id] = PlayerState{
            X:      player.x,
            Y:      player.y,
            Sprite: player.sprite,
        }
    }

    // Serialize and send
    data, err := json.Marshal(state)
    if err != nil {
        log.Printf("Error marshaling game state: %v", err)
        return
    }

    p8.SendMessage(p8.MsgGameState, "all", data)
}

func (g *Game) sendPlayerInput() {
    if !g.isClient {
        return
    }

    // Create input object based on current button states
    input := PlayerInput{
        Left:   p8.Btn(p8.LEFT),
        Right:  p8.Btn(p8.RIGHT),
        Up:     p8.Btn(p8.UP),
        Down:   p8.Btn(p8.DOWN),
        A:      p8.Btn(p8.A),
        B:      p8.Btn(p8.B),
    }

    // Serialize and send
    data, err := json.Marshal(input)
    if err != nil {
        log.Printf("Error marshaling player input: %v", err)
        return
    }

    p8.SendMessage(p8.MsgPlayerInput, "", data)
}
Step 7: Implement Draw Function
func (g *Game) Draw() {
    p8.Cls(0)

    // Display network status
    if p8.IsWaitingForPlayers() || p8.GetNetworkError() != "" {
        p8.DrawNetworkStatus(10, 10, 7)
        return
    }

    // Draw map
    for y := 0; y < len(g.map); y++ {
        for x := 0; x < len(g.map[y]); x++ {
            tileType := g.map[y][x]
            p8.Spr(tileType, float64(x)*g.tileSize, float64(y)*g.tileSize)
        }
    }

    // Draw all players
    for id, player := range g.players {
        p8.Spr(player.sprite, player.x, player.y)

        // Draw player ID above sprite
        p8.Print(id, player.x, player.y-8, 7)
    }

    // Draw network role
    if g.isServer {
        p8.Print("SERVER", 2, 2, 8)
    } else if g.isClient {
        p8.Print("CLIENT", 2, 2, 12)
    }
}
Step 8: Implement Collision Detection
func (g *Game) applyCollision(player Player) Player {
    // Get tile coordinates
    tileX := int(player.x / g.tileSize)
    tileY := int(player.y / g.tileSize)

    // Check surrounding tiles
    for y := tileY - 1; y <= tileY + 1; y++ {
        for x := tileX - 1; x <= tileX + 1; x++ {
            // Check map bounds
            if y >= 0 && y < len(g.map) && x >= 0 && x < len(g.map[y]) {
                tileType := g.map[y][x]

                // Check if tile is solid (e.g., tile type 1 is solid)
                if tileType == 1 {
                    // Simple collision detection
                    tileLeft := float64(x) * g.tileSize
                    tileRight := tileLeft + g.tileSize
                    tileTop := float64(y) * g.tileSize
                    tileBottom := tileTop + g.tileSize

                    playerLeft := player.x
                    playerRight := player.x + g.tileSize
                    playerTop := player.y
                    playerBottom := player.y + g.tileSize

                    // Check for collision
                    if playerRight > tileLeft && playerLeft < tileRight &&
                       playerBottom > tileTop && playerTop < tileBottom {
                        // Resolve collision
                        overlapX := math.Min(playerRight - tileLeft, tileRight - playerLeft)
                        overlapY := math.Min(playerBottom - tileTop, tileBottom - playerTop)

                        if overlapX < overlapY {
                            if playerLeft < tileLeft {
                                player.x -= overlapX
                            } else {
                                player.x += overlapX
                            }
                        } else {
                            if playerTop < tileTop {
                                player.y -= overlapY
                            } else {
                                player.y += overlapY
                            }
                        }
                    }
                }
            }
        }
    }

    return player
}
Step 9: Set Up Main Function
func main() {
    // Create and initialize the game
    game := &Game{}
    p8.InsertGame(game)
    game.Init()

    // Register network callbacks
    p8.SetOnGameStateCallback(handleGameState)
    p8.SetOnPlayerInputCallback(handlePlayerInput)
    p8.SetOnConnectCallback(handlePlayerConnect)
    p8.SetOnDisconnectCallback(handlePlayerDisconnect)

    // Start the game
    settings := p8.NewSettings()
    settings.WindowTitle = "PIGO8 Multiplayer Gameboy"
    p8.PlayGameWith(settings)
}
Advanced Topics
Bandwidth Optimization
To reduce bandwidth usage:
- Send Only What Changed: Only include changed values in game state
- Compression: Compress data before sending
- Update Frequency: Adjust update frequency based on game needs
- Delta Encoding: Send only differences from previous state
Handling Latency
Strategies for handling network latency:
- Client-Side Prediction: Predict movement locally
- Server Reconciliation: Correct client predictions
- Entity Interpolation: Smooth movement of remote entities
- Input Buffering: Buffer inputs to handle jitter
Synchronization Strategies
Different approaches to game synchronization:
- Lockstep: All clients wait for all inputs before advancing
- Snapshot Interpolation: Interpolate between received snapshots
- State Synchronization: Server sends authoritative state
- Event-Based: Synchronize via events rather than full state
Troubleshooting
Common Issues
- Jittery Movement: Implement client-side prediction and interpolation
- Desynchronization: Ensure server is authoritative for game logic
- High Latency: Optimize message size and frequency
- Connection Issues: Check network configuration and firewalls
Debugging Tools
- Logging: Add detailed logging for network events
- Visualization: Visualize network state and predictions
- Artificial Latency: Test with artificial latency
- Packet Inspection: Analyze packet contents and timing
Best Practices
- Keep It Simple: Start with minimal networking and add complexity as needed
- Test Early and Often: Test multiplayer functionality throughout development
- Graceful Degradation: Handle network issues gracefully
- Security: Validate all inputs on the server
By following this guide, you should be able to convert any PIGO8 game to multiplayer, including the Gameboy example. The key is to identify what needs to be synchronized, implement proper client-server communication, and add client-side prediction for a smooth player experience.
Porting a PICO-8 game to PIGO8
PICO-8 is a wonderful fantasy console with its own Lua-based game engine, but once your ideas outgrow the 128×128 constraint you may want to move to a general-purpose language.
Go is a simple, fast, modern language – and thanks to the pigo8 library you can actually port PICO-8 code almost line-for-line.
In this guide we’ll walk step-by-step through taking the NerdyTeachers “Animate Multiple Sprites” PICO-8 tutorial and rewriting it in Go.
We’ll start by setting up a project, extracting the sprite sheet with the parsepico tool, and then porting the Lua tables, animation timing, and update/draw loops into Go structs and methods.
Even if you’ve never used Go, we’ll explain how things like static typing and methods work along the way.
By the end you’ll have a running Go program with the same sprite animation logic which is essential for making games.
Parse PICO-8 sprites
Create a new folder, where you will place your project's code.
mkdir mygame; cd mygame
Fetch your p8 game into the directory
Copy from NerdyTeachers .p8 cartridge (p8 text file) into this folder.
PICO-8 carts come in two formats: the text-based .p8 format and the “.p8.png” format which hides the code/data inside a PNG image.
The text .p8 file contains the Lua source and data sections in plain text, while the .p8.png is a 128×128 image containing the same data (along with a screenshot). See:
You can load the .p8 file in PICO-8 or view it in a text editor to see the Lua code and sprite data.
Get the graphics
We want the sprite graphics from this cart. Namely, we mean these sprites:
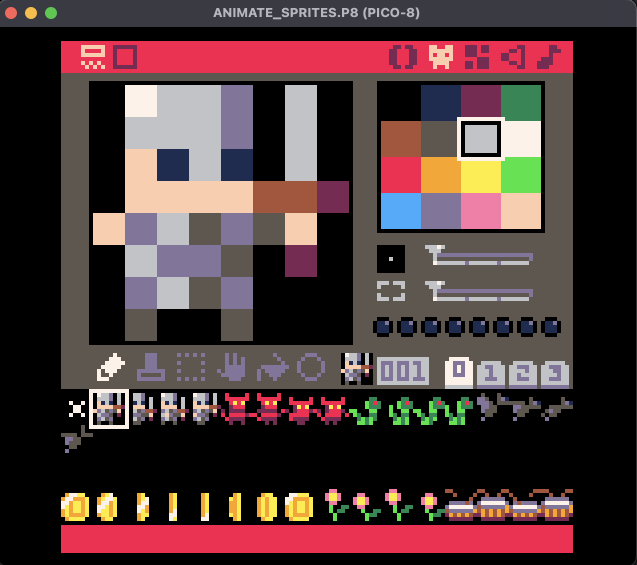
The simplest approach (but we won't do this) is to export the sprite sheet PNG from PICO-8 (by typing export sprites.png in the console). This would mean we need to write code to improt this PNG sprisheet.png and slice it in the code, not to mention there is no way to go around PICO-8 flag's configuration for sprites. To avoid such a thing, we will use another tool. One such tool is parsepico which can read a .p8 file and spit out the sprite images, maps, along with JSONs that have all the required metadata for PIGO8.
For example:
Fetch your *.p8 game and place it into that folder:
cp $PICO8/carts/animate_sprites.p8 .
Make sure the PICO-8 file is text file, and not PNG (e.g. p8.png is not supported).
# This is supported:
% file animate_sprites.p8
animate_sprites.p8: ASCII text


# This is not supported (you have to open PICO-8 and save it as *.p8)
% file animate_sprites.p8.png
animate_sprites.p8.png: PNG image data, 160 x 205, 8-bit/color RGBA, non-interlaced
Great so, the next step is to extract the sprites for this game. To do that, we will use a tool called [parsepico]. You can either fetch it from the release page in Github, or use Go packaging mechanism to install it directly to your system.
$ go install github.com/drpaneas/parsepico@latest
# Expected Output
go: downloading github.com/drpaneas/parsepico v1.0.6
If you follow this way, Go will download and save it at $GOPATH/bin.
You can verify this:
file `go env GOPATH`/bin/parsepico

# Output:
/Users/pgeorgia/gocode/bin/parsepico: Mach-O 64-bit executable arm64
To use it either call it from this location or add it to your PATH:
$ export PATH="`go env GOPATH`/bin:$PATH"
Now, you should be able to run this:
$ parsepico --help
# Expected Output
Usage of parsepico:
  -3	Include dual-purpose section 3 (sprites 128..191)
  -4	Include dual-purpose section 4 (sprites 192..255)
  -cart string
    	Path to the PICO-8 cartridge file (.p8)
  -clean
    	Remove old sprites directory, map.png, spritesheet.png if they exist
Note:
Using Go package manager is not required. You can always fetch the executable/binary directly from the release page of [parsepico] for your OS and architecture.
So now we confirmed we have the *.p8 game and parsepico installed, we can extract the graphics from this game:
$ parsepico --cart=animate_sprites.p8
This will parse the PICO-8 cart and generate several useful things.
From all of these, we are only interested in spritesheet.json which will be using in our PIGO8 game.
# Expected Output
No __map__ section found. Skipping map processing.
Saved 4 sections into 'sprites' folder.
Created spritesheet.png with 4 sections.
Successfully generated spritesheet.json # we will need only this
Successfully created individual sprite PNGs
That said, feel free to delete the rest of the generated files, to free some disk space:
$ rm -r sprites
$ rm spritesheet.png
Ok, so no we are ready to start writing Go code!
Port Lua to Go code
Ok so let's start the usual Go procedure by initializing Go Modules.
$ go mod init github.com/yourname/myGame
$ go mod tidy
Now you’re set up: we have Go installed, a project folder, and the PICO-8 cart and sprite image in place. Next, let’s review the Lua code we want to port.
The NerdyTeachers “Animate Multiple Sprites” tutorial uses Lua tables and loops to animate a player, some enemies, and items. Let’s highlight the key parts:
Lua code analysis
Let us study the original Lua code written for PICO-8, before try to port it to Go and PIGO8. We need to understand it.
Variables and tables
In PICO-8 Lua, global tables hold object data. For example, in _init() they create:
player = { sprite=1, x=-8, y=59, timing=0.25 }
enemies = {}
enemy1 = { sprite=5, x=-20, y=5, timing=0.1, speed=1.25, first=5, last=9 }
add(enemies, enemy1)
-- (and similarly enemy2, enemy3, items, etc)
Here each table has fields like sprite, x, y, timing, and (for enemies/items) first, last, speed.
The player table holds its current frame number and position.
Animation timing
The key trick in the tutorial is that each object’s sprite field is a number (not necessarily integer). Each update, they do:
object.sprite += object.timing
if object.sprite >= object.last then
    object.sprite = object.first
end
This floats sprite by a small increment so that frames advance more slowly than every tick. Because PICO-8 rounds down when drawing, a sprite index of 1.25 still draws sprite 1 until it reaches 2. This lets them animate at a fraction of the frame rate.
Movement
Each enemy moves horizontally by enemy.speed (or player.x += 1 for the player), and when x > 127, it resets to -8 to wrap around. In the code:
x += 1
if x > 127 then x = -8 end
The tutorials explains that the screen is 128 pixels wide (0–127), so setting x = -8 places the sprite just off-screen on the left, giving a smooth wrap.
A simplified game loop
Putting it together, the full Lua update code looks like this (single-object version for simplicity):
function _update()
    -- animate
    sprite += timing
    if sprite >= 5 then sprite = 1 end

    -- move
    x += 1
    if x > 127 then x = -8 end
end
This updates the sprite index and position each tick. For multiple objects, they repeat similar blocks inside loops.
The _draw() function simply loops through all objects and calls spr() on each.
We’ll mirror each of these concepts in Go.
Translate concepts to Go
Now we port these ideas into Go. In Go we’ll define a struct to represent an animated object, write methods for animation and movement, and set up update/draw loops. Unlike Lua’s flexible tables, Go has static typing: every field has a declared type. We’ll use float64 for everything so we don't bother type-casting. Here’s a basic struct:
// Entity represents an animated object (player, enemy, or item).
type Entity struct {
    Sprite float64   // current sprite index (can be fractional for timing)
    X, Y   float64   // position on screen
    Timing float64   // how much to advance per frame
    Speed  float64   // horizontal movement speed (0 for static items)
    First  float64       // first sprite index in animation loop
    Last   float64       // one past the last sprite index in animation loop
}
Notice the fields correspond to the Lua table keys.
For example, player = {sprite=1, x=-8, y=59, timing=0.25} becomes something like Entity{Sprite:1, X:-8, Y:59, Timing:0.25, First:1, Last:5}.
We include First and Last so each entity knows its animation range (for the player in the tutorial, first=1 and last=5 since sprites 1–4 are used). We’ll write a Factory constructor function to create these easily:
// NewEntity creates a new AnimatedEntity.
func NewEntity(sprite, x, y, timing, speed, first, last float64) Entity {
	return Entity{
		// Animation properties
		sprite: sprite,
		timing: timing,
		first:  first,
		last:   last,

		// Movement properties
		x:     x,
		y:     y,
		speed: speed,
	}
}
This mirrors the Lua enemy1 = { sprite=5, x=-20, y=5, timing=0.1, speed=1.25, first=5, last=9 }.
We have to pass numeric arguments in the correct order; Go’s strictness means we can’t omit fields like you can in Lua. Using a constructor helps avoid mistakes.
Next, we’ll give Entity two methods:
Animate()Move().
These will update the sprite index and position, similar to the Lua _update logic:
// Animate updates the sprite based on the timing and resets it within its cycle.
// Requires first and last values for each entity.
func (ae *Entity) Animate() {
	ae.sprite += ae.timing
	if ae.sprite >= ae.last {
		ae.sprite = ae.first
	}
}

// Move updates the entity's x-coordinate using the provided offset.
// It wraps the position around if it exceeds the right boundary (128).
func (ae *Entity) Move(offset float64) {
	ae.x += offset
	if ae.x > 128 {
		ae.x = -8
	}
}
With our Entity defined, let’s build the game. We can create slices (dynamic arrays) to hold enemies and items:
var player Entity
var enemies = []Entity{}
var items = []Entity{}
In the tutorial’s _init(), they set up each enemy and then use add(enemies, enemy).
In Go we’ll do something like:
func (m *myGame) Init() {
	player = NewEntity(1, -8, 59, 0.25, 1, 1, 5)

	enemy1 := NewEntity(5, -20, 5, 0.1, 1.25, 5, 9)
	enemy2 := NewEntity(9, -14, 30, 0.2, 0.4, 9, 13)
	enemy3 := NewEntity(13, -11, 90, 0.4, 0.75, 13, 17)
	enemies = append(enemies, enemy1, enemy2, enemy3)

	item1 := NewEntity(48, 30, 110, 0.3, 48, 50, 56)
	item2 := NewEntity(56, 60, 110, 0.25, 54, 56, 60)
	item3 := NewEntity(60, 90, 110, 0.15, 4, 60, 64)
	items = append(items, item1, item2, item3)
}
Here we’re mimicking the Lua tables from the tutorial, just using Go syntax.
Note how we pack each enemy and item into Go slices; this replaces Lua’s add(enemies, enemy1) and the for ... in all(enemies) logic. In Go, to loop over a slice we will later write for _, enemy := range g.Enemies { ... }.
Building the Update and Draw Loop
func (m *myGame) Update() {
	// Update player: animate and move (player moves by 1 unit per frame)
	player.Animate()
	player.Move(player.speed)

	// Update enemies: animate and move based on each entity's speed
	for i := range enemies {
		enemies[i].Animate()
		enemies[i].Move(enemies[i].speed)
	}

	// Update items: animate only, don't move
	for i := range items {
		items[i].Animate()
	}
}

func (m *myGame) Draw() {
	p8.Cls(0) // clear screen

	player.Draw() // Draw the player

    // Draw all enemies
	for _, enemy := range enemies {
		enemy.Draw()
	}

    // // Draw all items
	for _, item := range items {
		item.Draw()
	}
}
In these snippets, we call a hypothetical pigo8.Spr(index, x, y) function (mirroring PICO-8’s spr()) and pigo8.Cls() to clear the screen. The logic is the same as the Lua _draw(): draw each object’s current frame at its position.
Notice how we converted the Lua loops into Go for loops. For instance, the Lua code:
for enemy in all(enemies) do
    spr(enemy.sprite, enemy.x, enemy.y)
end
becomes Go:
for _, enemy := range g.Enemies {
    pigo8.Spr(enemy.Sprite, enemy.X, enemy.Y)
}
We use range to iterate over the slice.
Full Go Program
package main

import (
	p8 "github.com/drpaneas/pigo8"
)

type Entity struct {
	sprite, x, y, timing, speed, first, last float64
}

func NewEntity(sprite, x, y, timing, speed, first, last float64) Entity {
	return Entity{
		sprite: sprite,
		timing: timing,
		first:  first,
		last:   last,
		x:      x,
		y:      y,
		speed:  speed,
	}
}

func (ae *Entity) Animate() {
	ae.sprite += ae.timing
	if ae.sprite >= ae.last {
		ae.sprite = ae.first
	}
}

func (ae *Entity) Move(offset float64) {
	ae.x += offset
	if ae.x > 128 {
		ae.x = -8
	}
}

func (ae *Entity) Draw() {
	p8.Spr(ae.sprite, ae.x, ae.y)
}

var player Entity
var enemies = []Entity{}
var items = []Entity{}

type myGame struct{}

func (m *myGame) Init() {
	player = NewEntity(1, -8, 59, 0.25, 1, 1, 5)
	enemy1 := NewEntity(5, -20, 5, 0.1, 1.25, 5, 9)
	enemy2 := NewEntity(9, -14, 30, 0.2, 0.4, 9, 13)
	enemy3 := NewEntity(13, -11, 90, 0.4, 0.75, 13, 17)
	enemies = append(enemies, enemy1, enemy2, enemy3)
	item1 := NewEntity(48, 30, 110, 0.3, 48, 50, 56)
	item2 := NewEntity(56, 60, 110, 0.25, 54, 56, 60)
	item3 := NewEntity(60, 90, 110, 0.15, 4, 60, 64)
	items = append(items, item1, item2, item3)
}

func (m *myGame) Update() {
	player.Animate()
	player.Move(player.speed)

	for i := range enemies {
		enemies[i].Animate()
		enemies[i].Move(enemies[i].speed)
	}

	for i := range items {
		items[i].Animate()
	}
}

func (m *myGame) Draw() {
	p8.Cls(0)
	player.Draw()

	for _, enemy := range enemies {
		enemy.Draw()
	}

	for _, item := range items {
		item.Draw()
	}
}

func main() {
	p8.InsertGame(&myGame{})
	p8.Play()
}
To try the game, use the Go tools. In your project directory, run:
go run .
This compiles and runs the main.go program (the . means run the current module).
You should see a window or output with your animated sprites moving, just like in the PICO-8 demo.
To build a standalone executable, use:
go build -o mygame
This produces a binary named mygame (or mygame.exe on Windows).
You can then run ./mygame anytime to play your game.
Tutorial: Building Pong
Let's build a complete Pong game step by step.
Final Result
Two paddles, a ball, scoring, and AI opponent.
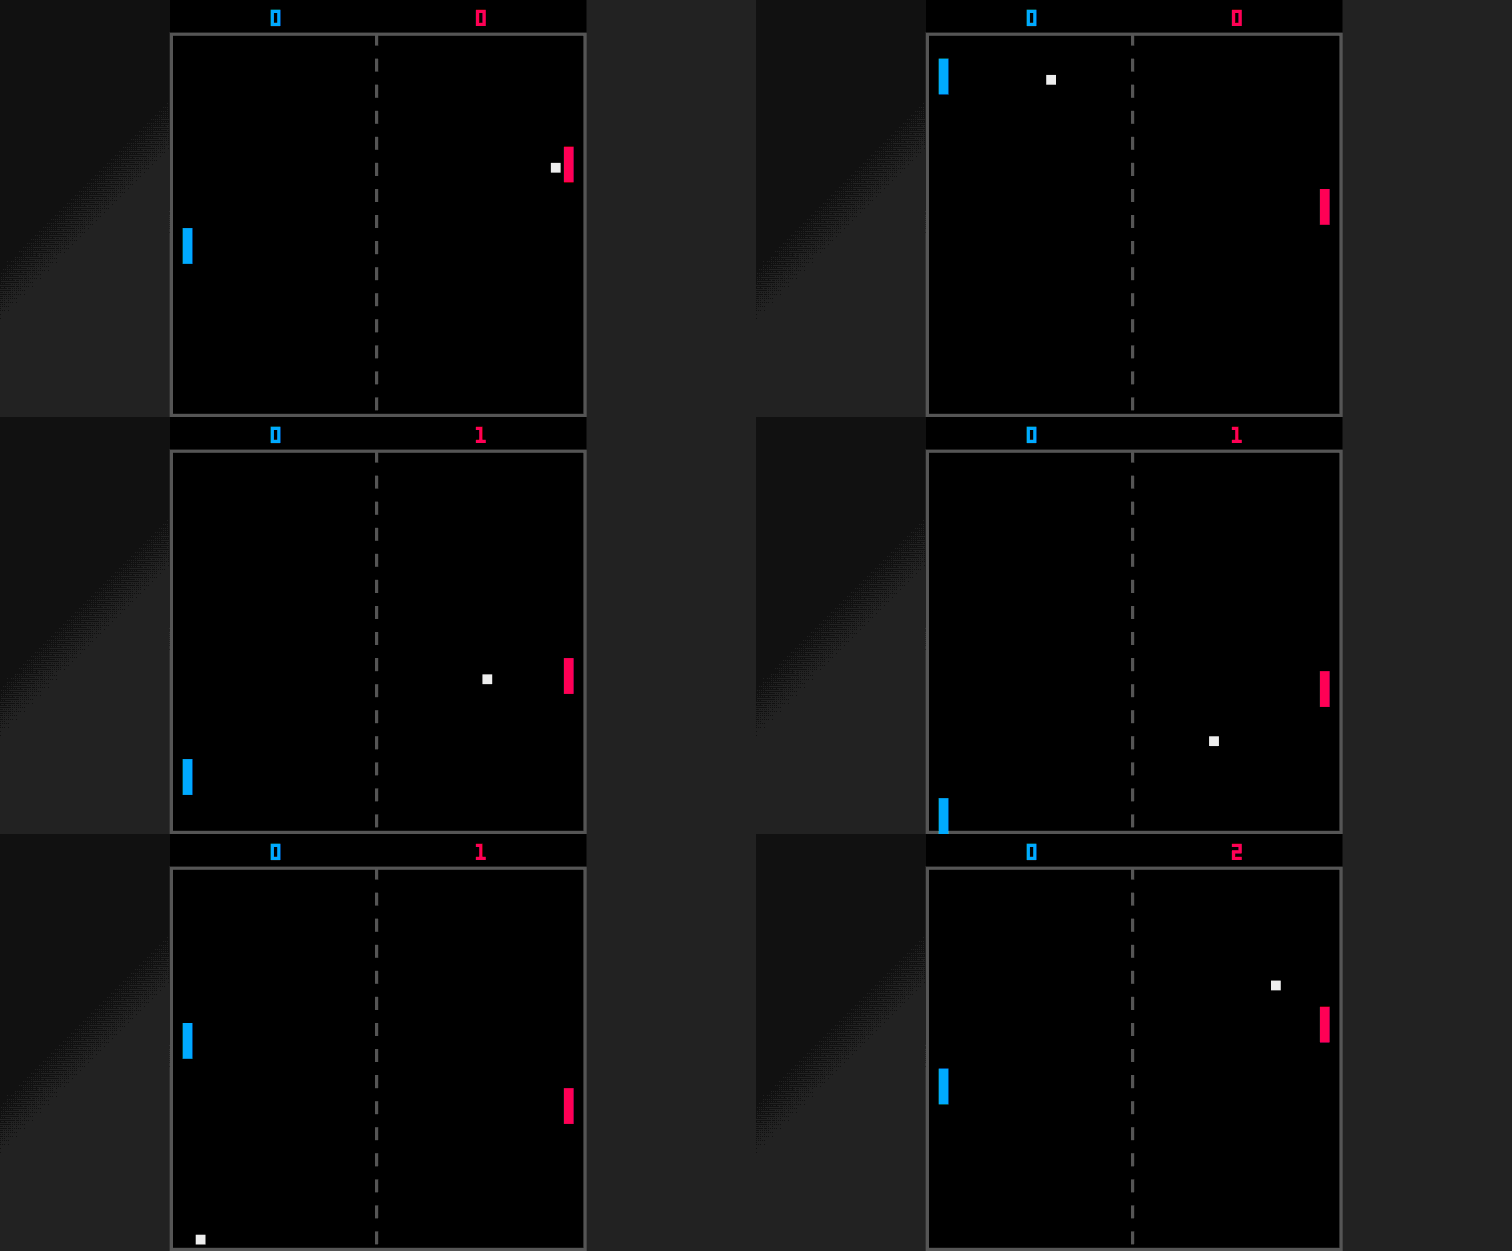
Step 1: Project Setup
mkdir pong && cd pong
go mod init pong
go get github.com/drpaneas/pigo8
Create main.go:
package main

import p8 "github.com/drpaneas/pigo8"

type Game struct{}

func (g *Game) Init()   {}
func (g *Game) Update() {}
func (g *Game) Draw()   { p8.Cls(0) }

func main() {
    p8.InsertGame(&Game{})
    p8.Play()
}
Step 2: Define Game Objects
type Paddle struct {
    x, y, width, height, speed float64
    color int
}

type Ball struct {
    x, y, size   float64
    dx, dy       float64
    color        int
}

type Game struct {
    player   Paddle
    computer Paddle
    ball     Ball
    playerScore   int
    computerScore int
}
Step 3: Initialize Positions
func (g *Game) Init() {
    // Player paddle on the left
    g.player = Paddle{
        x: 4, y: 54,
        width: 4, height: 20,
        speed: 2, color: 12,
    }

    // Computer paddle on the right
    g.computer = Paddle{
        x: 120, y: 54,
        width: 4, height: 20,
        speed: 1.5, color: 8,
    }

    // Ball in center
    g.ball = Ball{
        x: 62, y: 62,
        size: 4,
        dx: 2, dy: 1,
        color: 7,
    }
}
Step 4: Player Input
func (g *Game) Update() {
    // Player movement
    if p8.Btn(p8.UP) && g.player.y > 0 {
        g.player.y -= g.player.speed
    }
    if p8.Btn(p8.DOWN) && g.player.y+g.player.height < 128 {
        g.player.y += g.player.speed
    }
}
Step 5: Ball Movement and Wall Bouncing
func (g *Game) Update() {
    // ... player input ...

    // Move ball
    g.ball.x += g.ball.dx
    g.ball.y += g.ball.dy

    // Bounce off top/bottom walls
    if g.ball.y <= 0 || g.ball.y+g.ball.size >= 128 {
        g.ball.dy = -g.ball.dy
    }
}
Step 6: Paddle Collision
func collides(ball Ball, paddle Paddle) bool {
    return ball.x+ball.size >= paddle.x &&
           ball.x <= paddle.x+paddle.width &&
           ball.y+ball.size >= paddle.y &&
           ball.y <= paddle.y+paddle.height
}

func (g *Game) Update() {
    // ... previous code ...

    // Paddle collision
    if collides(g.ball, g.player) || collides(g.ball, g.computer) {
        g.ball.dx = -g.ball.dx
    }
}
Step 7: Scoring
func (g *Game) Update() {
    // ... previous code ...

    // Score when ball exits
    if g.ball.x < 0 {
        g.computerScore++
        g.resetBall()
    }
    if g.ball.x > 128 {
        g.playerScore++
        g.resetBall()
    }
}

func (g *Game) resetBall() {
    g.ball.x = 62
    g.ball.y = 62
    g.ball.dx = -g.ball.dx  // Serve toward last scorer
}
Step 8: AI Opponent
func (g *Game) Update() {
    // ... previous code ...

    // Simple AI: follow the ball
    if g.ball.dx > 0 {  // Ball moving toward AI
        mid := g.computer.y + g.computer.height/2
        if mid < g.ball.y && g.computer.y+g.computer.height < 128 {
            g.computer.y += g.computer.speed
        }
        if mid > g.ball.y && g.computer.y > 0 {
            g.computer.y -= g.computer.speed
        }
    }
}
Step 9: Drawing
func (g *Game) Draw() {
    p8.Cls(0)

    // Center line
    for y := 0; y < 128; y += 8 {
        p8.Line(64, float64(y), 64, float64(y+4), 5)
    }

    // Paddles
    p8.Rectfill(g.player.x, g.player.y,
        g.player.x+g.player.width, g.player.y+g.player.height,
        g.player.color)
    p8.Rectfill(g.computer.x, g.computer.y,
        g.computer.x+g.computer.width, g.computer.y+g.computer.height,
        g.computer.color)

    // Ball
    p8.Rectfill(g.ball.x, g.ball.y,
        g.ball.x+g.ball.size, g.ball.y+g.ball.size,
        g.ball.color)

    // Score
    p8.Print(g.playerScore, 32, 4, 12)
    p8.Print(g.computerScore, 92, 4, 8)
}
Complete Code
package main

import p8 "github.com/drpaneas/pigo8"

type Paddle struct {
    x, y, width, height, speed float64
    color                      int
}

type Ball struct {
    x, y, size float64
    dx, dy     float64
    color      int
}

type Game struct {
    player        Paddle
    computer      Paddle
    ball          Ball
    playerScore   int
    computerScore int
}

func (g *Game) Init() {
    g.player = Paddle{x: 4, y: 54, width: 4, height: 20, speed: 2, color: 12}
    g.computer = Paddle{x: 120, y: 54, width: 4, height: 20, speed: 1.5, color: 8}
    g.ball = Ball{x: 62, y: 62, size: 4, dx: 2, dy: 1, color: 7}
}

func (g *Game) Update() {
    // Player input
    if p8.Btn(p8.UP) && g.player.y > 0 {
        g.player.y -= g.player.speed
    }
    if p8.Btn(p8.DOWN) && g.player.y+g.player.height < 128 {
        g.player.y += g.player.speed
    }

    // AI
    if g.ball.dx > 0 {
        mid := g.computer.y + g.computer.height/2
        if mid < g.ball.y && g.computer.y+g.computer.height < 128 {
            g.computer.y += g.computer.speed
        }
        if mid > g.ball.y && g.computer.y > 0 {
            g.computer.y -= g.computer.speed
        }
    }

    // Ball movement
    g.ball.x += g.ball.dx
    g.ball.y += g.ball.dy

    // Wall bounce
    if g.ball.y <= 0 || g.ball.y+g.ball.size >= 128 {
        g.ball.dy = -g.ball.dy
    }

    // Paddle collision
    if collides(g.ball, g.player) || collides(g.ball, g.computer) {
        g.ball.dx = -g.ball.dx
    }

    // Scoring
    if g.ball.x < 0 {
        g.computerScore++
        g.resetBall()
    }
    if g.ball.x > 128 {
        g.playerScore++
        g.resetBall()
    }
}

func (g *Game) Draw() {
    p8.Cls(0)

    // Center line
    for y := 0; y < 128; y += 8 {
        p8.Line(64, float64(y), 64, float64(y+4), 5)
    }

    // Game objects
    p8.Rectfill(g.player.x, g.player.y, g.player.x+g.player.width, g.player.y+g.player.height, g.player.color)
    p8.Rectfill(g.computer.x, g.computer.y, g.computer.x+g.computer.width, g.computer.y+g.computer.height, g.computer.color)
    p8.Rectfill(g.ball.x, g.ball.y, g.ball.x+g.ball.size, g.ball.y+g.ball.size, g.ball.color)

    // Score
    p8.Print(g.playerScore, 32, 4, 12)
    p8.Print(g.computerScore, 92, 4, 8)
}

func (g *Game) resetBall() {
    g.ball.x = 62
    g.ball.y = 62
    g.ball.dx = -g.ball.dx
}

func collides(ball Ball, paddle Paddle) bool {
    return ball.x+ball.size >= paddle.x &&
        ball.x <= paddle.x+paddle.width &&
        ball.y+ball.size >= paddle.y &&
        ball.y <= paddle.y+paddle.height
}

func main() {
    settings := p8.NewSettings()
    settings.TargetFPS = 60
    settings.WindowTitle = "PIGO-8 Pong"
    p8.InsertGame(&Game{})
    p8.PlayGameWith(settings)
}
Next Steps
- Add sound effects for paddle hits and scoring
- Implement difficulty levels
- Add a two-player mode
- Create a title screen
- Add ball speed increase over time
See examples/pong/main.go for the full implementation with sound effects.
PIGO8 Cheatsheet
For full explanations, parameter tables, and examples, see the API Reference.
Quick Reference
Initialization
p8.InsertGame(&myGame{})  // Register game
p8.Play()                 // Start with defaults
p8.PlayGameWith(settings) // Start with custom settings
Screen
p8.Cls(color)            // Clear screen
p8.GetScreenWidth()      // Get width (128)
p8.GetScreenHeight()     // Get height (128)
Drawing
p8.Pset(x, y, color)     // Set pixel
p8.Pget(x, y)            // Get pixel color
p8.Line(x1, y1, x2, y2, color)
p8.Rect(x1, y1, x2, y2, color)
p8.Rectfill(x1, y1, x2, y2, color)
p8.Circ(x, y, r, color)
p8.Circfill(x, y, r, color)
p8.Print(text, x, y, color)
Sprites
p8.Spr(n, x, y)                    // Draw sprite
p8.Spr(n, x, y, w, h, flipX, flipY)
p8.Sspr(sx, sy, sw, sh, dx, dy)    // Draw region
p8.Sget(x, y)                      // Get spritesheet pixel
p8.Sset(x, y, color)               // Set spritesheet pixel
bitfield, isSet := p8.Fget(sprite, flag)  // Get flag (returns 2 values)
p8.Fset(sprite, flag, value)              // Set sprite flag
Maps
p8.Map(mx, my, sx, sy, w, h, layers)
p8.Mget(x, y)            // Get tile sprite
p8.Mset(x, y, sprite)    // Set tile sprite
Input
p8.Btn(button)           // Is button held?
p8.Btnp(button)          // Was button just pressed?
p8.GetMouseXY()          // Get mouse position
// Buttons: LEFT, RIGHT, UP, DOWN, O (Z), X (X)
// ButtonStart (Enter), ButtonMouseLeft, etc.
Audio
p8.Music(n)              // Play audio once
p8.Music(n, true)        // Play exclusively
p8.MusicLoop(n)          // Play in a loop
p8.StopMusic(n)          // Stop specific
p8.StopMusic(-1)         // Stop all
// F32 variants also exist: MusicF32, MusicLoopF32, StopMusicF32
Camera
p8.Camera(x, y)          // Set offset
p8.Camera()              // Reset to (0,0)
Palette
p8.Pal(c0, c1)           // Swap colors
p8.Pal()                 // Reset palette swap
p8.Palt(color, transparent)  // Set transparency
p8.Palt()                // Reset transparency
p8.Color(c)              // Set draw color
Collision
p8.ColorCollision(x, y, color)
p8.MapCollision(x, y, flag, w, h)
Math
p8.Flr(n)                // Floor (returns int)
p8.Rnd(n)                // Random 0 to n-1 (returns int)
p8.Sqrt(n)               // Square root (returns float64)
p8.Sign(float64(n))      // -1.0 or 1.0 (takes float64)
p8.Time()                // Seconds elapsed (returns float64)
Settings
settings := p8.NewSettings()
settings.ScreenWidth = 160
settings.ScreenHeight = 144
settings.ScaleFactor = 4
settings.TargetFPS = 60
settings.WindowTitle = "My Game"
settings.Fullscreen = true
settings.DisableHiDPI = true // Default: true
Color Palette
| 0 | 1 | 2 | 3 | 4 | 5 | 6 | 7 |
|---|---|---|---|---|---|---|---|
| Black | DarkBlue | DarkPurple | DarkGreen | Brown | DarkGray | LightGray | White |
| 8 | 9 | 10 | 11 | 12 | 13 | 14 | 15 |
|---|---|---|---|---|---|---|---|
| Red | Orange | Yellow | Green | Blue | Indigo | Pink | Peach |
Button Constants
| Direction | Face | Menu | Mouse |
|---|---|---|---|
LEFT (0) | O (4) | ButtonStart (6) | ButtonMouseLeft |
RIGHT (1) | X (5) | ButtonSelect (7) | ButtonMouseRight |
UP (2) | ButtonMouseMiddle | ||
DOWN (3) |
Game Structure
type game struct {
// Your state
}
func (g *game) Init() { /* once at start */ }
func (g *game) Update() { /* every frame */ }
func (g *game) Draw() { /* every frame */ }
func main() {
p8.InsertGame(&game{})
p8.Play()
}
Common Patterns
Movement
if p8.Btn(p8.LEFT) { g.x-- }
if p8.Btn(p8.RIGHT) { g.x++ }
if p8.Btn(p8.UP) { g.y-- }
if p8.Btn(p8.DOWN) { g.y++ }
Animation
frame := int(p8.Time() * 10) % 4
p8.Spr(1 + frame, x, y)
Tile Collision
tileX := p8.Flr(g.x / 8)
tileY := p8.Flr(g.y / 8)
if p8.MapCollision(g.x, g.y, 0) {
// Hit solid tile
}
API Reference
This section documents every public function, type, and constant in the PIGO8 game-development API - organized by domain, with full parameter descriptions and runnable examples.
If you want a fast one-line-per-function lookup instead, see the Cheatsheet. This reference is the deep version: full explanations, parameter tables, and examples for each function.
How to Read an Entry
Each function entry follows this format:
- Signature - the exact Go function signature, including generic type parameters where used.
- Description - what it does and how it behaves, including edge cases (out-of-range coordinates, invalid color indices, etc.).
- Parameters - a table of every parameter, its type, and its meaning.
- Example - a runnable snippet showing typical usage.
- See also - links to the matching conceptual guide page.
Generic Coordinate Types
Many drawing functions (Spr, Line, Rect, Circ, Mget, Sget, and others) accept
coordinates as Go generics constrained to a Number type, meaning you can pass int,
float64, or any other standard numeric type interchangeably without manual conversion:
p8.Spr(1, 10, 20) // int coordinates
p8.Spr(1, 10.5, 20.0) // float64 coordinates
p8.Spr(1, 10, 20.0) // mixed - also valid
Advanced / Internal APIs
PIGO8 also exports a number of lower-level types used internally for performance optimization:
sprite and pixel caches (SpriteImageCache, SpritePixelCache, LRUCache), batching systems
(PixelBatchSystem, SpriteBatchSystem), resource tracking (ResourceManager,
ResourceLimits), and render tuning (RenderConfig, SetRenderConfig). These exist to support
the engine's own rendering pipeline and advanced tuning scenarios, not everyday game code. They
are intentionally not covered in this reference; if you need them, browse the source directly
with go doc github.com/drpaneas/pigo8 <Name>.
Reference Pages
- Screen & Drawing
- Colors & Palette
- Sprites
- Maps
- Input
- Audio
- Camera
- Collision
- Math
- Settings & Lifecycle
Screen & Drawing
Cls(colorIndex ...int)
Clears the current drawing screen with a specified PICO-8 color index. If no colorIndex is
provided, it defaults to 0 (black).
Parameters:
| Name | Type | Description |
|---|---|---|
colorIndex | int (optional, variadic) | PICO-8 color index (0-15). Defaults to 0 (black). |
Example:
p8.Cls() // clear to black
p8.Cls(12) // clear to blue
See also: Screen
ClsRGBA(clr color.RGBA)
Clears the current drawing screen with a specified RGBA color instead of a PICO-8 color index, allowing any RGBA color to be used.
Parameters:
| Name | Type | Description |
|---|---|---|
clr | color.RGBA | The RGBA color to clear the screen with. |
Example:
p8.ClsRGBA(color.RGBA{R: 100, G: 150, B: 200, A: 255}) // custom blue
p8.ClsRGBA(color.RGBA{}) // transparent black
See also: Screen
Pset(x, y int, colorIndex ...int)
Draws a single pixel at coordinates (x, y) using the specified PICO-8 color index, or the
current cursor color if omitted. Pset uses raw screen coordinates - unlike sprites and
shapes, it is not affected by the camera offset. Out-of-bounds coordinates or invalid color
indices are silently ignored (with a logged warning for invalid colors).
Parameters:
| Name | Type | Description |
|---|---|---|
x, y | int | Screen pixel coordinates. |
colorIndex | int (optional, variadic) | PICO-8 color index (0-15). Defaults to the current cursor color. |
Example:
p8.Cursor(0, 0, 8) // set current color to red
p8.Pset(10, 20) // draws a red pixel at (10, 20)
p8.Pset(50, 50, 12) // draws a blue pixel at (50, 50), overriding the cursor color
See also: Pixels
Pget(x, y int) int
Returns the PICO-8 color index (0-15) of the pixel at (x, y). Returns 0 (black) if the
coordinates are out of bounds or the pixel doesn't exactly match a palette color.
Parameters:
| Name | Type | Description |
|---|---|---|
x, y | int | Screen pixel coordinates to sample. |
Example:
p8.Pset(10, 20, 8)
idx := p8.Pget(10, 20) // idx == 8
See also: Pixels
Line[X1, Y1, X2, Y2 Number](x1 X1, y1 Y1, x2 X2, y2 Y2, options ...interface{})
Draws a line between two points. Mimics PICO-8's line(x1, y1, x2, y2, color). Like Rect,
Circ, and their filled variants, Line applies the current camera offset (set via Camera).
Parameters:
| Name | Type | Description |
|---|---|---|
x1, y1 | Number | Starting point coordinates. |
x2, y2 | Number | Ending point coordinates. |
color (via options) | int (optional) | PICO-8 color index (0-15). Defaults to the current draw color (7, white). |
Example:
p8.Line(0, 0, 127, 127, 8) // diagonal red line across the screen
See also: Shapes
Rect[X1, Y1, X2, Y2 Number](x1 X1, y1 Y1, x2 X2, y2 Y2, options ...interface{})
Draws an outline rectangle using two opposing corner points. Mimics PICO-8's rect(x1, y1, x2, y2, color).
Parameters:
| Name | Type | Description |
|---|---|---|
x1, y1, x2, y2 | Number | Coordinates of two opposing corners. |
color (via options) | int (optional) | PICO-8 color index (0-15). Defaults to the current draw color. |
Example:
p8.Rect(10, 10, 40, 30, 11) // green outlined rectangle
See also: Shapes
Rectfill[X1, Y1, X2, Y2 Number](x1 X1, y1 Y1, x2 X2, y2 Y2, options ...interface{})
Draws a filled rectangle using two opposing corner points. Mimics PICO-8's rectfill(x1, y1, x2, y2, color).
Parameters: Same as Rect.
Example:
p8.Rectfill(10, 10, 40, 30, 11) // filled green rectangle
See also: Shapes
Circ[X, Y, R Number](x X, y Y, radius R, options ...interface{})
Draws an outline circle. Mimics PICO-8's circ(x, y, radius, color).
Parameters:
| Name | Type | Description |
|---|---|---|
x, y | Number | Center point coordinates. |
radius | Number | Circle radius. |
color (via options) | int (optional) | PICO-8 color index (0-15). Defaults to the current draw color. |
Example:
p8.Circ(64, 64, 20, 9) // orange outlined circle at the center
See also: Shapes
Circfill[X, Y, R Number](x X, y Y, radius R, options ...interface{})
Draws a filled circle. Mimics PICO-8's circfill(x, y, radius, color).
Parameters: Same as Circ.
Example:
p8.Circfill(64, 64, 20, 9) // filled orange circle
See also: Shapes
Print(s any, args ...int) (int, int)
Draws s (converted via fmt.Sprintf("%v", s)) onto the screen at the implicit print cursor,
mimicking PICO-8's print(str, [x, y], color), including cursor tracking. Returns the (x, y)
coordinates immediately after the printed string.
Parameters:
| Name | Type | Description |
|---|---|---|
s | any | Value to print (formatted with %v). |
args | int (optional, variadic) | []: use cursor position/color. [color]: cursor position, given color. [x, y]: given position, cursor color. [x, y, color]: given position and color. |
Returns: the X and Y screen coordinates immediately after the printed text.
Example:
p8.Cursor(0, 0, 6)
p8.Print("1 HELLO") // prints at (0,0) in light gray, cursor moves to (0,6)
p8.Print("2 AT", 20, 20) // prints at (20,20) in light gray
endX, endY := p8.Print("3 DONE") // prints at (20,26), returns next cursor position
See also: Text
Cursor(args ...int)
Sets the implicit print cursor position and optionally the default draw color, mimicking
PICO-8's cursor(x, y, color). Calling with no arguments resets the position to (0, 0) without
changing the color.
Parameters:
| Name | Type | Description |
|---|---|---|
args | int (optional, variadic) | []: reset to (0,0). [x, y]: set position. [x, y, color]: set position and draw color. |
Example:
p8.Cursor(10, 20) // move cursor to (10, 20)
p8.Cursor(30, 40, 5) // move cursor and set draw color to 5
p8.Cursor() // reset to (0, 0)
See also: Text
GetScreenWidth() int
Returns the current logical screen width in pixels (128 by default, or the value configured via
Settings.ScreenWidth).
Example:
w := p8.GetScreenWidth()
GetScreenHeight() int
Returns the current logical screen height in pixels (128 by default, or the value configured via
Settings.ScreenHeight).
Example:
h := p8.GetScreenHeight()
Colors & Palette
Pal(args ...interface{})
Configures draw palette mappings, mimicking PICO-8's pal(c0, c1, p). When color c0 is
requested for drawing, c1 is used instead.
Parameters:
| Name | Type | Description |
|---|---|---|
args | variadic | []: reset all mappings. [c0, c1]: map c0 -> c1 for the draw palette. [c0, c1, p]: p=0 maps the draw palette; p=1 (screen palette post-processing) is not implemented and logs a warning. |
Example:
p8.Pal(8, 12) // draw color 8 (red) as color 12 (blue) instead
p8.Pal() // reset all palette mappings
See also: Colors and Palette
Palt(args ...interface{})
Sets color transparency for drawing. With no arguments, resets to default (only black transparent).
Parameters:
| Name | Type | Description |
|---|---|---|
color | int | PICO-8 color index (0-15). |
transparent | bool | true to make the color transparent, false to make it opaque. |
Note: the real signature is variadic (args ...interface{}); color and transparent are extracted positionally from args rather than being named parameters (the same pattern used by Cursor/Print).
Example:
p8.Spr(1, 10, 10) // default transparency (black transparent)
p8.Palt(8, true) // make red transparent
p8.Spr(1, 20, 10) // now red pixels in the sprite are transparent
p8.Palt() // reset to default transparency
See also: Colors and Palette
Color(colorIndex int)
Sets the current draw color used by subsequent drawing operations.
Parameters:
| Name | Type | Description |
|---|---|---|
colorIndex | int | PICO-8 color index (0-15). |
Example:
p8.Color(8) // set current draw color to red
p8.Sset(10, 20) // draws a red pixel on the spritesheet at (10, 20)
See also: Colors and Palette
GetPaletteColor(colorIndex int) color.Color
Returns the color.Color at the given palette index, or nil if out of range.
Parameters:
| Name | Type | Description |
|---|---|---|
colorIndex | int | PICO-8 color index (0-15) to look up. |
Example:
c := p8.GetPaletteColor(3)
See also: Colors and Palette
GetPaletteSize() int
Returns the current number of colors in the active palette.
Example:
size := p8.GetPaletteSize()
p8.Print(fmt.Sprintf("Palette has %d colors", size), 10, 10, 7)
See also: Colors and Palette
SetPalette(newPalette []color.Color)
Replaces the entire color palette. Resizes the transparency array to match, resetting only index 0 as transparent by default.
Parameters:
| Name | Type | Description |
|---|---|---|
newPalette | []color.Color | The full replacement palette. |
Example:
grayscale := []color.Color{
color.RGBA{0, 0, 0, 255},
color.RGBA{85, 85, 85, 255},
color.RGBA{170, 170, 170, 255},
color.RGBA{255, 255, 255, 255},
}
p8.SetPalette(grayscale)
See also: Palette Effects
SetPaletteColor(colorIndex int, newColor color.Color)
Replaces a single palette color at the given index. No-op if the index is out of range.
Parameters:
| Name | Type | Description |
|---|---|---|
colorIndex | int | PICO-8 color index (0-15) to replace. |
newColor | color.Color | The new color to place at that index. |
Example:
p8.SetPaletteColor(7, color.RGBA{200, 220, 255, 255}) // change white to light blue
See also: Palette Effects
Sprites
Spr[SN, X, Y Number](spriteNumber SN, x X, y Y, options ...any)
Draws sprite spriteNumber (and optionally a fractional block of surrounding sprites) at
(x, y).
Parameters:
| Name | Type | Description |
|---|---|---|
spriteNumber | Number | Index of the top-left sprite to draw. |
x, y | Number | Screen coordinates for the top-left corner. |
w, h (via options) | float64 or int (optional) | Width/height multiplier in sprites (default 1.0 each). |
flipX, flipY (via options) | bool (optional) | Flip horizontally/vertically (default false). |
Example:
p8.Spr(1, 10, 20) // draw sprite 1 at (10, 20)
p8.Spr(1, 50, 20, 1.5, 1.0) // draw sprite 1 plus half of sprite 2
p8.Spr(0, 90, 20, 1.5, 1.5, true) // 1.5x1.5 sprite block, flipped horizontally
See also: Drawing Sprites
Sspr[SX, SY, SW, SH, DX, DY Number](sx SX, sy SY, sw SW, sh SH, dx DX, dy DY, options ...any)
Draws an arbitrary rectangular region of the spritesheet, with optional stretching and flipping.
Mimics PICO-8's sspr(sx, sy, sw, sh, dx, dy, [dw, dh], [flip_x], [flip_y]).
Parameters:
| Name | Type | Description |
|---|---|---|
sx, sy | Number | Source position on the spritesheet, in pixels. |
sw, sh | Number | Source width/height, in pixels. |
dx, dy | Number | Destination position on screen, in pixels. |
dw, dh (via options) | Number (optional) | Destination width/height (defaults to sw/sh). |
flipX, flipY (via options) | bool (optional) | Flip horizontally/vertically (default false). |
Example:
p8.Sspr(8, 8, 16, 16, 10, 20) // copy a 16x16 region as-is
p8.Sspr(8, 8, 16, 16, 10, 20, 32, 32) // stretched to 32x32 on screen
p8.Sspr(8, 8, 16, 16, 10, 20, 16, 16, true, false) // flipped horizontally
See also: Spritesheet Regions
Sget[X, Y Number](x X, y Y) int
Returns the PICO-8 color index (0-15) of the pixel at (x, y) on the spritesheet. Returns 0 if
out of bounds.
Parameters:
| Name | Type | Description |
|---|---|---|
x, y | Number | Pixel coordinates on the spritesheet. |
Example:
pixelColor := p8.Sget(10, 20)
Sset[X, Y Number](x X, y Y, colorIndex ...int)
Sets the color of a pixel at (x, y) on the spritesheet. Uses the current draw color if
colorIndex is omitted.
Parameters:
| Name | Type | Description |
|---|---|---|
x, y | Number | Pixel coordinates on the spritesheet. |
colorIndex | int (optional, variadic) | PICO-8 color index (0-15). Defaults to the current draw color. |
Example:
p8.Sset(10, 0, 8) // red pixel at (10, 0) on the spritesheet
p8.Color(12)
p8.Sset(16, 0) // blue pixel, using the current draw color
Fget(spriteNum int, flag ...int) (bitfield int, isSet bool)
Returns a sprite's flag status. With no flag argument, returns the full 8-bit bitfield
(0-255). With a flag argument (0-7), isSet reports whether that specific flag is set.
Example:
_, isSet := p8.Fget(1, 0) // is flag 0 set on sprite 1?
allFlags, _ := p8.Fget(2) // full bitfield for sprite 2
See also: Sprite Flags
Fset(spriteNum int, flagOrValue interface{}, value ...interface{})
Sets a sprite's flag status. If flagOrValue is a flag number (0-7), value sets that flag on
or off. If no value is given, flagOrValue is treated as a boolean or bitfield applied to all
flags.
Example:
p8.Fset(1, 0, true) // set flag 0 on sprite 1
p8.Fset(2, false) // clear all flags on sprite 2
p8.Fset(2, 170) // set flags 1,3,5,7 via bitfield (170 = 2+8+32+128)
See also: Sprite Flags
Maps
Map(args ...any)
Draws a rectangular region of the map to the screen.
Parameters:
| Name | Type | Description |
|---|---|---|
mx, my | int (optional) | Map tile coordinates to start reading from (default 0, 0). |
sx, sy | int (optional) | Screen pixel coordinates to draw at (default 0, 0). |
w, h | int (optional) | Dimensions in tiles (default 16x16). |
layers | int (optional) | Bitfield to filter drawn sprites by their flags (0 = draw all). |
Example:
p8.Map() // draw the default 16x16 tile region at (0,0)
p8.Map(0, 0, 0, 0, 32, 32) // draw a 32x32 tile region
p8.Map(0, 0, 0, 0, 32, 32, 1) // only draw tiles whose sprite has flag 0 set
Map() caches its composited tile image across frames for performance; see
SetMapCacheEnabled if you need to
disable that for a map that changes every frame.
See also: Drawing Maps
Mget[C, R Number](column C, row R) int
Returns the sprite number placed at the given map column/row.
Parameters:
| Name | Type | Description |
|---|---|---|
column, row | Number | Map tile coordinates to read from. |
Example:
sprite := p8.Mget(5, 3)
Mset[C, R, S Number](column C, row R, sprite S)
Sets the sprite number at the given map column/row.
Parameters:
| Name | Type | Description |
|---|---|---|
column, row | Number | Map tile coordinates to write to. |
sprite | Number | Sprite number to place at that tile. |
Example:
p8.Mset(5, 3, 1) // place sprite 1 at column 5, row 3
See also: Map Data
Input
Btn(buttonIndex int, playerIndex ...int) bool
Reports whether a button is currently held down, via keyboard (player 0 only), gamepad, mouse,
or gamepad axes. Mimics PICO-8's btn().
Parameters:
| Name | Type | Description |
|---|---|---|
buttonIndex | int | PICO-8 button index (0-15) - see the button constants (LEFT, RIGHT, UP, DOWN, O, X, ButtonStart, ButtonSelect, and mouse/gamepad-specific constants). |
playerIndex | int (optional) | Local player slot (0-7). Defaults to 0. Player 0 reads keyboard, mouse, and its assigned gamepad; players 1-7 read only their assigned gamepad. Gamepads are assigned to players by ascending gamepad ID among currently connected gamepads. An out-of-range value (< 0 or > 7) returns false. |
Example:
if p8.Btn(p8.LEFT) { g.x-- }
if p8.Btn(p8.RIGHT) { g.x++ }
// Two local players, each with their own gamepad:
if p8.Btn(p8.LEFT, 0) { player1.x-- }
if p8.Btn(p8.LEFT, 1) { player2.x-- }
Btnp(buttonIndex int, playerIndex ...int) bool
Reports whether a button was just pressed this frame (transitioned from up to down, no
auto-repeat). Mimics PICO-8's btnp(). Keyboard input only applies to player 0; mouse input
applies to all player indices; gamepad input is scoped to each player's assigned gamepad (see
Btn's playerIndex parameter above for the assignment rule).
Example:
if p8.Btnp(p8.X) {
// jump
}
// Check if the 'Start' button was just pressed on player 1's gamepad
if p8.Btnp(p8.ButtonStart, 1) {
// pause for player 1
}
See also: Keyboard
GetMouseXY() (int, int)
Returns the current mouse X and Y coordinates. Mimics PICO-8's mouse().
Example:
mx, my := p8.GetMouseXY()
p8.Circ(mx, my, 4, 8)
See also: Mouse
Audio
Music(n int, exclusive ...bool)
Plays the audio file with ID n. If n is -1, stops all currently playing audio. If
exclusive is true, stops all other audio first.
Parameters:
| Name | Type | Description |
|---|---|---|
n | int | Audio ID to play, or -1 to stop all currently playing audio. |
exclusive | bool (optional, variadic) | If true, stops all other audio before playing. Defaults to false. |
Example:
p8.Music(0) // play audio 0 (mixes with anything already playing)
p8.Music(0, true) // play audio 0, stopping everything else first
MusicLoop(n int, exclusive ...bool)
Plays audio n in a loop. Equivalent to MusicWithOptions(n, MusicOptions{Loop: true}).
Parameters:
| Name | Type | Description |
|---|---|---|
n | int | Audio ID to play in a loop. |
exclusive | bool (optional, variadic) | If true, stops all other audio before playing. Defaults to false. |
StopMusic(id int)
Stops the audio file with the given ID. If id is -1, stops all audio.
Parameters:
| Name | Type | Description |
|---|---|---|
id | int | Audio ID to stop, or -1 to stop all audio. |
MusicWithOptions(n int, opts MusicOptions) / MusicOptions
Plays audio n using explicit options instead of variadic booleans.
MusicOptions fields:
| Field | Type | Description |
|---|---|---|
Exclusive | bool | If true, stops all other audio before playing. |
Loop | bool | If true, loops indefinitely. |
Example:
p8.MusicWithOptions(0, p8.MusicOptions{Loop: true, Exclusive: true})
32-bit float variants: MusicF32, MusicLoopF32, StopMusicF32, MusicF32WithOptions
Identical behavior to their non-F32 counterparts, but use 32-bit float audio, the recommended
approach for Ebitengine v2.8+ for better performance and easier audio processing.
Example:
p8.MusicF32(0)
p8.MusicLoopF32(1)
p8.StopMusicF32(-1) // stop all
See also: Music and Sound
Camera
Camera(args ...any)
Sets the camera position, offsetting all subsequent drawing operations (shapes, Print,
sprites, and maps). With no arguments, resets the camera to (0, 0). Mimics PICO-8's
camera(x, y).
Parameters:
| Name | Type | Description |
|---|---|---|
x, y | any (optional) | Horizontal/vertical camera offset. Calling with only x sets the horizontal offset and resets y to 0 (matches PICO-8 behavior). |
Example:
p8.Camera(64, 32) // set camera to (64, 32)
p8.Camera(64) // set x to 64, y resets to 0
p8.Camera() // reset to (0, 0)
// Lock UI in place while the world scrolls:
p8.Camera()
p8.Print("SCORE: 1000", 2, 2)
p8.Camera(playerX-64, playerY-64)
p8.Map()
See also: Camera
Collision
ColorCollision[X, Y Number](x X, y Y, color int) bool
Reports whether the pixel at (x, y) matches color. Returns false if the coordinates are
out of screen bounds (0 to GetScreenWidth()-1 / GetScreenHeight()-1, 0-127 by default) or the
color index is invalid.
Parameters:
| Name | Type | Description |
|---|---|---|
x, y | Number | Screen pixel coordinates to check. |
color | int | PICO-8 color index (0-15) to compare against. |
Example:
if p8.ColorCollision(player.x, player.y, 3) {
// touching a wall (color 3)
}
See also: Color Collision
MapCollision[X, Y Number](x X, y Y, flag int, size ...int) bool
Reports whether a rectangular area starting at (x, y) overlaps any map tile whose sprite has
flag set. Internally resolves overlapping tiles via Mget/Fget.
Parameters:
| Name | Type | Description |
|---|---|---|
x, y | Number | Top-left pixel coordinates of the area to check. |
flag | int | Sprite flag number (0-7) to check for on underlying tiles. |
size | int (optional, variadic) | []: 8x8 area. [s]: sxs area. [w, h]: wxh area. |
Example:
if p8.MapCollision(player.x, player.y, 0) {
// collision with default 8x8 area, checking flag 0
}
playerWidth, playerHeight := 14, 15
if p8.MapCollision(player.x, player.y, 0, playerWidth, playerHeight) {
// collision with a custom-sized area, checking flag 0
}
See also: Map Collision
Math
Flr[T Number](a T) int
Rounds down to the nearest whole integer. Mimics PICO-8's flr().
Parameters:
| Name | Type | Description |
|---|---|---|
a | Number | The number to round down. |
Example:
p8.Flr(1.99) // 1
p8.Flr(-5.3) // -6
Rnd[T Number](a T) int
Returns a random integer in [0, floor(a)). Returns 0 if a is zero or negative. Mimics
PICO-8's flr(rnd(a)). Uses Go's math/rand; unlike PICO-8, results are not deterministic
across runs unless you explicitly seed the global source.
Parameters:
| Name | Type | Description |
|---|---|---|
a | Number | The exclusive upper bound for the random result. |
Example:
p8.Rnd(5) // 0, 1, 2, 3, or 4
p8.Rnd(5.9) // 0-4 (floor(5.9) = 5)
Sqrt[T Number](a T) float64
Returns the square root. Returns 0 for negative input (unlike math.Sqrt, which returns NaN),
matching PICO-8 behavior.
Parameters:
| Name | Type | Description |
|---|---|---|
a | Number | The number to take the square root of. |
Example:
p8.Sqrt(16) // 4.0
p8.Sqrt(-4) // 0.0
Sign(v float64) float64
Returns the sign of v, with 0 treated as +1.
Example:
p8.Sign(-3.5) // -1.0
p8.Sign(0) // 1.0
Time() float64
Returns the number of seconds elapsed since the game started, based on the number of Update
calls. Multiple calls within the same frame return the same value.
Example:
frame := int(p8.Time() * 10) % 4
p8.Spr(1+frame, x, y) // simple 4-frame animation
See also: Math Functions
Settings & Lifecycle
Cartridge interface
type Cartridge interface {
Init() // Called once at the start.
Update() // Called every frame for logic.
Draw() // Called every frame for drawing.
}
Your game struct must implement this interface. See The Game Loop.
InsertGame(cartridge Cartridge)
Registers your game implementation with PIGO8. Call this before Play()/PlayGameWith() -
skipping it doesn't error, but runs a no-op cartridge with empty Init/Update/Draw
methods (a blank window), so your game logic never runs.
Play()
Runs the console with default settings, using the cartridge registered via InsertGame.
Equivalent to PlayGameWith(NewSettings()).
PlayGameWith(settings *Settings)
Runs the console with custom settings.
NewSettings() *Settings
Creates a Settings object populated with defaults.
Settings struct
| Field | Type | Default | Description |
|---|---|---|---|
ScaleFactor | int | 4 | Integer window scaling factor. |
WindowTitle | string | "PIGO-8 Game" | Window title bar text. |
TargetFPS | int | 30 | Target ticks per second. |
ScreenWidth | int | 128 | Logical screen width. |
ScreenHeight | int | 128 | Logical screen height. |
Multiplayer | bool | false | Enable multiplayer networking. |
Fullscreen | bool | false | Start in fullscreen. |
ColorSpace | ebiten.ColorSpace | default | Rendering color space. |
DisableHiDPI | bool | true | Disable HiDPI scaling. |
SpriteImageCacheSize | int | 256 | Max cached transparent sprite images. |
SpritePixelCacheSize | int | 256 | Max cached sprite pixel data entries. |
SsprCacheSize | int | 128 | Max cached Sspr source regions. |
MapCacheEnabled | bool | true | Enable map tile caching. |
EnableFrameStats | bool | false | Enable frame-level performance statistics. |
Example:
settings := p8.NewSettings()
settings.WindowTitle = "My Game"
settings.ScaleFactor = 4
settings.TargetFPS = 60
settings.ScreenWidth = 160
settings.ScreenHeight = 144
p8.InsertGame(&game{})
p8.PlayGameWith(settings)
SetMapCacheEnabled(enabled bool)
Enables or disables the composited-image cache used by Map(). Mirrors Settings.MapCacheEnabled
at startup, but can also be called at runtime - useful for a map that's regenerated every frame
(e.g. procedural generation), where a stale cache would otherwise show outdated tiles.
Example:
p8.SetMapCacheEnabled(false) // always redraw the map fresh, e.g. before a procedural rebuild
p8.Map()
p8.SetMapCacheEnabled(true) // re-enable for normal scrolling performance
See also: Settings, The Game Loop
PICO-8 to PIGO8 Comparison
Key Differences
| Aspect | PICO-8 | PIGO8 |
|---|---|---|
| Language | Lua | Go |
| Array indexing | Starts at 1 | Starts at 0 |
| Code limits | 8192 tokens | None |
| Memory limits | 32KB | None |
| Resolution | Fixed 128×128 | Configurable |
| Platform | Fantasy console | Native + WebAssembly |
| License | Commercial ($15) | MIT (free) |
Function Mapping
Graphics
| PICO-8 | PIGO8 | Notes |
|---|---|---|
cls(c) | p8.Cls(c) | Same |
pset(x,y,c) | p8.Pset(x,y,c) | Same |
pget(x,y) | p8.Pget(x,y) | Same |
line(x1,y1,x2,y2,c) | p8.Line(x1,y1,x2,y2,c) | Same |
rect(x1,y1,x2,y2,c) | p8.Rect(x1,y1,x2,y2,c) | Same |
rectfill(...) | p8.Rectfill(...) | Same |
circ(x,y,r,c) | p8.Circ(x,y,r,c) | Same |
circfill(...) | p8.Circfill(...) | Same |
print(s,x,y,c) | p8.Print(s,x,y,c) | Same |
color(c) | p8.Color(c) | Same |
cursor(x,y,c) | p8.Cursor(x,y,c) | Same |
Sprites
| PICO-8 | PIGO8 | Notes |
|---|---|---|
spr(n,x,y,w,h,fx,fy) | p8.Spr(n,x,y,w,h,fx,fy) | Same |
sspr(...) | p8.Sspr(...) | Same |
sget(x,y) | p8.Sget(x,y) | Same |
sset(x,y,c) | p8.Sset(x,y,c) | Same |
fget(n,f) | p8.Fget(n,f) | Returns (bitfield, isSet) |
fset(n,f,v) | p8.Fset(n,f,v) | Same |
Maps
| PICO-8 | PIGO8 | Notes |
|---|---|---|
map(mx,my,sx,sy,w,h,l) | p8.Map(mx,my,sx,sy,w,h,l) | Same |
mget(x,y) | p8.Mget(x,y) | Same |
mset(x,y,s) | p8.Mset(x,y,s) | Same |
Input
| PICO-8 | PIGO8 | Notes |
|---|---|---|
btn(b) | p8.Btn(p8.LEFT) | Use constants |
btnp(b) | p8.Btnp(p8.X) | Use constants |
Palette
| PICO-8 | PIGO8 | Notes |
|---|---|---|
pal(c0,c1) | p8.Pal(c0,c1) | Same |
pal() | p8.Pal() | Reset |
palt(c,t) | p8.Palt(c,t) | Same |
Math
| PICO-8 | PIGO8 | Notes |
|---|---|---|
flr(x) | p8.Flr(x) | Same |
rnd(x) | p8.Rnd(x) | Returns int, not float |
sqrt(x) | p8.Sqrt(x) | Same |
sin(x) | math.Sin(x) | Use Go's math package |
cos(x) | math.Cos(x) | Use Go's math package |
abs(x) | math.Abs(x) | Use Go's math package |
min(a,b) | math.Min(a,b) | Use Go's math package |
max(a,b) | math.Max(a,b) | Use Go's math package |
Audio
| PICO-8 | PIGO8 | Notes |
|---|---|---|
sfx(n) | p8.Music(n) | Plays WAV files |
music(n) | p8.Music(n) | Same function |
Time
| PICO-8 | PIGO8 | Notes |
|---|---|---|
t() | p8.T() or p8.Time() | Same |
time() | p8.Time() | Same |
Camera
| PICO-8 | PIGO8 | Notes |
|---|---|---|
camera(x,y) | p8.Camera(x,y) | Same |
camera() | p8.Camera() | Reset to (0,0) |
PIGO8 Extras
These functions are unique to PIGO8:
| Function | Description |
|---|---|
p8.ColorCollision(x,y,c) | Pixel-based collision |
p8.MapCollision(x,y,f,w,h) | Tile-based collision |
p8.GetScreenWidth() | Get screen dimensions |
p8.GetScreenHeight() | Get screen dimensions |
p8.SetPalette(colors) | Custom palettes |
p8.SetPaletteColor(i,c) | Change single color |
p8.ClsRGBA(c) | Clear with any color |
Code Example Comparison
PICO-8 (Lua)
function _init()
x = 64
y = 64
end
function _update()
if btn(0) then x -= 1 end
if btn(1) then x += 1 end
if btn(2) then y -= 1 end
if btn(3) then y += 1 end
end
function _draw()
cls(0)
spr(1, x, y)
end
PIGO8 (Go)
type game struct {
x, y float64
}
func (g *game) Init() {
g.x = 64
g.y = 64
}
func (g *game) Update() {
if p8.Btn(p8.LEFT) { g.x-- }
if p8.Btn(p8.RIGHT) { g.x++ }
if p8.Btn(p8.UP) { g.y-- }
if p8.Btn(p8.DOWN) { g.y++ }
}
func (g *game) Draw() {
p8.Cls(0)
p8.Spr(1, g.x, g.y)
}
func main() {
p8.InsertGame(&game{})
p8.Play()
}
Migration Tips
- Arrays: Change
arr[1]toarr[0] - Variables: Declare with
varor:= - Functions: Use
funckeyword - Methods: Attach to structs with receivers
- Math: Import
mathpackage for sin/cos/etc. - Strings: Use
fmt.Sprintffor formatting - Tables: Use structs or maps
- Local: All Go variables are local by default
FAQ & Troubleshooting
Installation & Build
"cgo: C compiler not found" or similar CGO errors
Ebitengine (which PIGO8 is built on) requires CGO and a C compiler. Install one for your platform:
- macOS:
xcode-select --install - Linux:
sudo apt install gcc(Debian/Ubuntu) orsudo dnf install gcc(Fedora) - Windows: install TDM-GCC or MinGW-w64 and ensure it's on your
PATH.
See Installation for full platform notes.
Linux build fails with missing audio/graphics libraries
Install the required development libraries before building:
# Debian/Ubuntu
sudo apt install libasound2-dev libgl1-mesa-dev xorg-dev
# Fedora
sudo dnf install alsa-lib-devel mesa-libGL-devel xorg-x11-server-devel
go build for WebAssembly fails with "GOOS=js GOARCH=wasm" errors
Make sure you're not manually setting GOOS/GOARCH in your shell environment before running
cmd/webexport - it sets these itself. If building manually, use:
GOOS=js GOARCH=wasm go build -o game.wasm .
and copy wasm_exec.js from your Go installation's $(go env GOROOT)/lib/wasm/wasm_exec.js
(Go 1.24+) or misc/wasm/wasm_exec.js (earlier versions). See
Web Export for the full workflow, which automates this.
Runtime
The window opens but shows a blank/black screen
- Make sure you call
p8.Cls(...)at the start of yourDraw()method - without clearing, the screen may show stale or undefined content on some platforms. - Confirm
Draw()is actually being called: add a temporaryp8.Print("draw", 0, 0, 7)to verify. - If you're loading sprites/maps from
spritesheet.json/map.json, confirm those files are in the same directory as your executable when runninggo run .(or embedded - see Resource Embedding).
My sprite doesn't show up / looks wrong
- Sprite indices are 0-based. Sprite 0 is the top-left sprite of your spritesheet.
- Check
Palt()- if the sprite's background color happens to match your current transparent color, parts of it may render as "invisible" unexpectedly. - If you recently edited
spritesheet.jsonwith the PIGO8 Editor, confirm you saved (the editor autosaves on switching modes, but verify the file's modification time).
Audio doesn't play on Linux
Confirm libasound2-dev (or your distro's ALSA development package) is installed - see the
Linux build section above. If audio still doesn't play, check that your audio files follow the
music0.wav, music1.wav, ... naming convention expected by Music()/MusicLoop().
Browser build: audio doesn't play until I click something
This is expected - browsers block autoplaying audio until the user interacts with the page. The web-exported page's virtual controls handle this automatically; audio starts working after the first button press. See Web Export.
Movement feels too fast/slow after changing TargetFPS
Fixed per-frame movement values (like g.x++) move faster at higher FPS. Use p8.Time() to
compute frame-rate-independent movement instead of relying on a fixed FPS. See
The Game Loop.
Where to Get Help
If your issue isn't covered here, check the GitHub issues or open a new one with a minimal reproduction.